This super cute little guy was based off a pixelated image created by Kandi Patterns and was made by a nine year old.
She used the pixel image to count and drop the yellow, white, black and red Perler beads into place to form Pikachu.
We used the masking tape method (see Perler for more info) to tape off sections when the project was ready for ironing. Using a large piece of cardboard and ironing paper, we were able to get him melted. (Unfortunately, she was ironing it on a table that was old and had some indentions in it) However, overall he still came out pretty great!
Drop me a comment or picture if you try this cute pattern out! Would love to know see your project!
If you would like to check out some additional Perler Bead Patterns or Projects, click on the Menu at the top of the page or click some of the links below.
Ever wanted a Perler Bead or Hama Bead pattern that you could spend time happily crafting so that you can melt it and put it in a framed picture for the wall? This classic piece is from the Super Nintendo Legend of Zelda – A Link to the Past.
Made with over 3,800 Perler Beads and 6 grids! Original design xpeachart or cocomademosielle depending on which pin you look at.
This one did take a few hours to create. If you recreate this pattern, I would suggest getting a large piece of cardboard or cardboard box to lay underneath the grids.
We used a medium shipping box from Walmart, cut in half like the first picture below. (One box should make two large pieces with two of the sides of the box in each piece.) Then we laid the grids on top of one side. Once the scene was complete and before ironing, we used the masking tape method to tape the entire picture. (If you would like to learn more about this method, Perler has a great tutorial on their site.) Once the masking tape was secure, we were able to fold the top side of the box down and enclosed the grid inside (basically a grid sandwich with the cardboard on both sides). This made flipping the grids so much easier!
I wanted the scene to have the pixel look so after ironing, ours turned out like this..
Leave me a comment or picture if you try this one and let me know how yours turns out!
If you would like to check out additional Perler Bead Patterns, click on the Menu at the top of the page or click some of the links below.
My son’s friend created this awesome Perler bead design to represent the Nintendo Game Cube. He used purple, black, white, orange, and gray beads on a hexagon grid. Once melted, the finished project looked like this… I liked it from both the front and the back sides of the cube.
If you like this or want to see something different, please check out some of our patterns and designs…
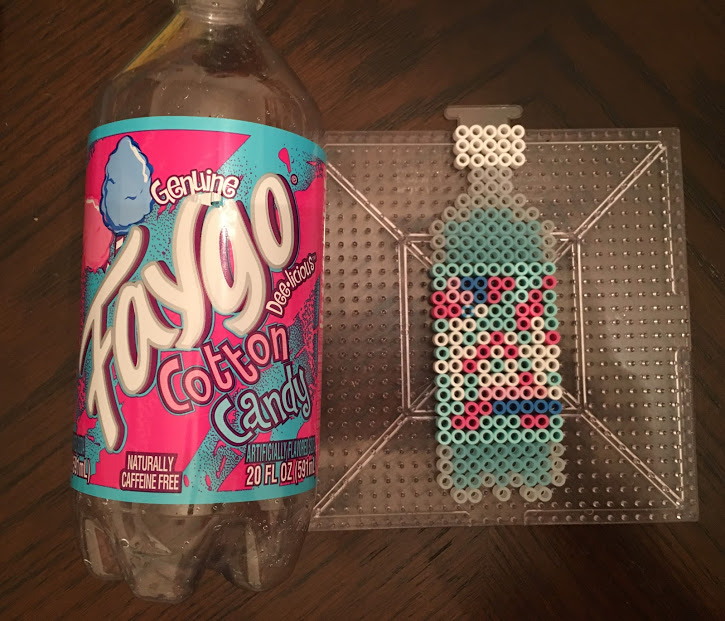
One day, my son, his friend and I were all sitting at the table creating Perler Bead projects. My son’s friend had this drink with him and said it was one of his favorites. The result- a Perler Bead Faygo Cotton Candy project of course! Below is his design. Unfortunately, I forgot to get a melted picture of it, but it turned out pretty great!
Beads used: white, glitter white, glitter blue, pink, cranberry, blue, and light blue. You can get all of these colors at your local craft store or at Amazon. You can buy them by individual colors or a mixed bag.
If you would like to check out more Perler Bead Patterns, click on the Menu at the top of the page or click some of the links below.
As we were looking at new picture frames, we thought we would try to make some Perler bead designs that could be hot glued to a frame to make the picture and frame stand out. Looking forward to trying lots more designs.
If you need any of Perler/Hama beads, the links will take you to the items on Amazon. Enjoy!
1. My Little Pony – Rainbow Dash
This was for my daughter. In retrospect, I would make the frame a few more lines higher to make it a better fit for the frame. This frame fits a 4 x 6 frame and we bought ours for $1.00 at Dollar Tree. Original designer – ashmoondesigns- deviant art. Beads used were blue, pastel blue, yellow, red, orange, and white.
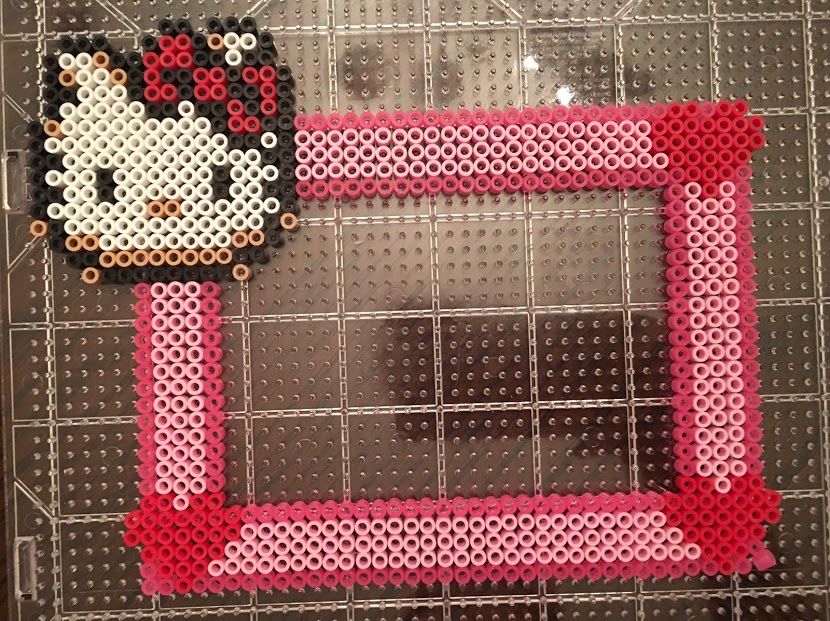
2. Hello Kitty
This one was for my little sister who still loves Hello Kitty! Original designer – yumeleona23 at Deviant Art. Beads used were glitter pink, red, white, tan, black, light pink. I love the way it turned out when glued on the frame! I did use the masking tape method to iron it but I’m sure you could do it either way.
3. TV Picture Frame
Original design- my daughter. She made this one to fit around a 4 x 6 frame. Unfortunately I didn’t get the picture of the completed project but the design is below. Beads used – black, light brown, and gray.
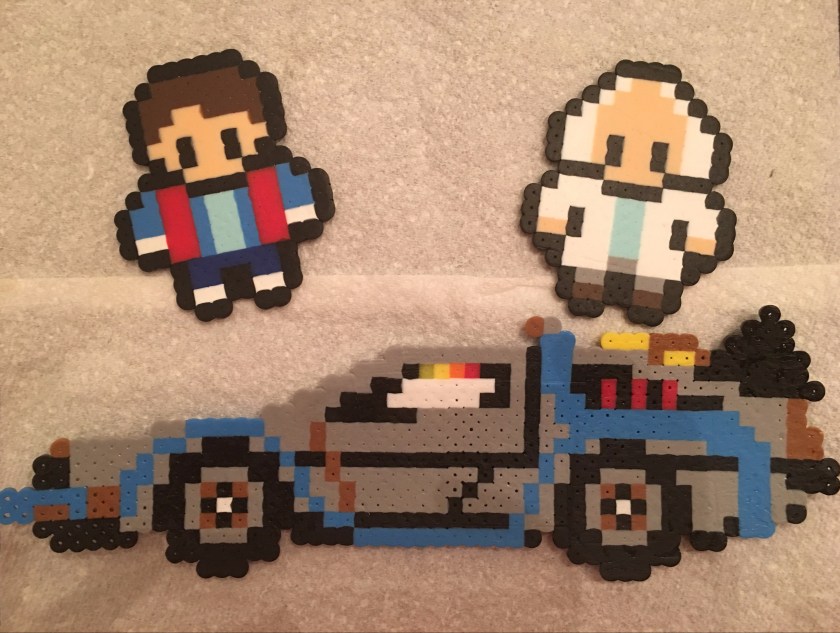
Back to the Future is my husband’s all time favorite movie and the kids love it also. When we came across Perler Bead patterns of Doc and Marty, I just had to build it!
Special thanks to the original poster of this picture which inspired us. Grids and Perler beads can be found at Amazon here – grids or perler beads
We like our beads a little more heated to give it the blended effect instead of the beaded effect. However, whichever way you choose, they will turn out amazing!
Marty
Doc
Of course, the DeLorean
These were super fun to build and only took about an hour or so for all three. The DeLorean was definitely the hardest, however it was super fun. They now hold a nice place of honor in our Perler Bead Collection!
My kids and I have recently discovered Perler beads and the amazing fun crafts that you can make out of them. Perler beads are found at craft stores like Hobby Lobby and Amazon and can be used to make awesome patterns. Finish them off with an iron and they are perfect to hang up or have cute decorations for a party or bedroom.
Here are a few Zelda Themed Patterns- We will add more as we find and make them.
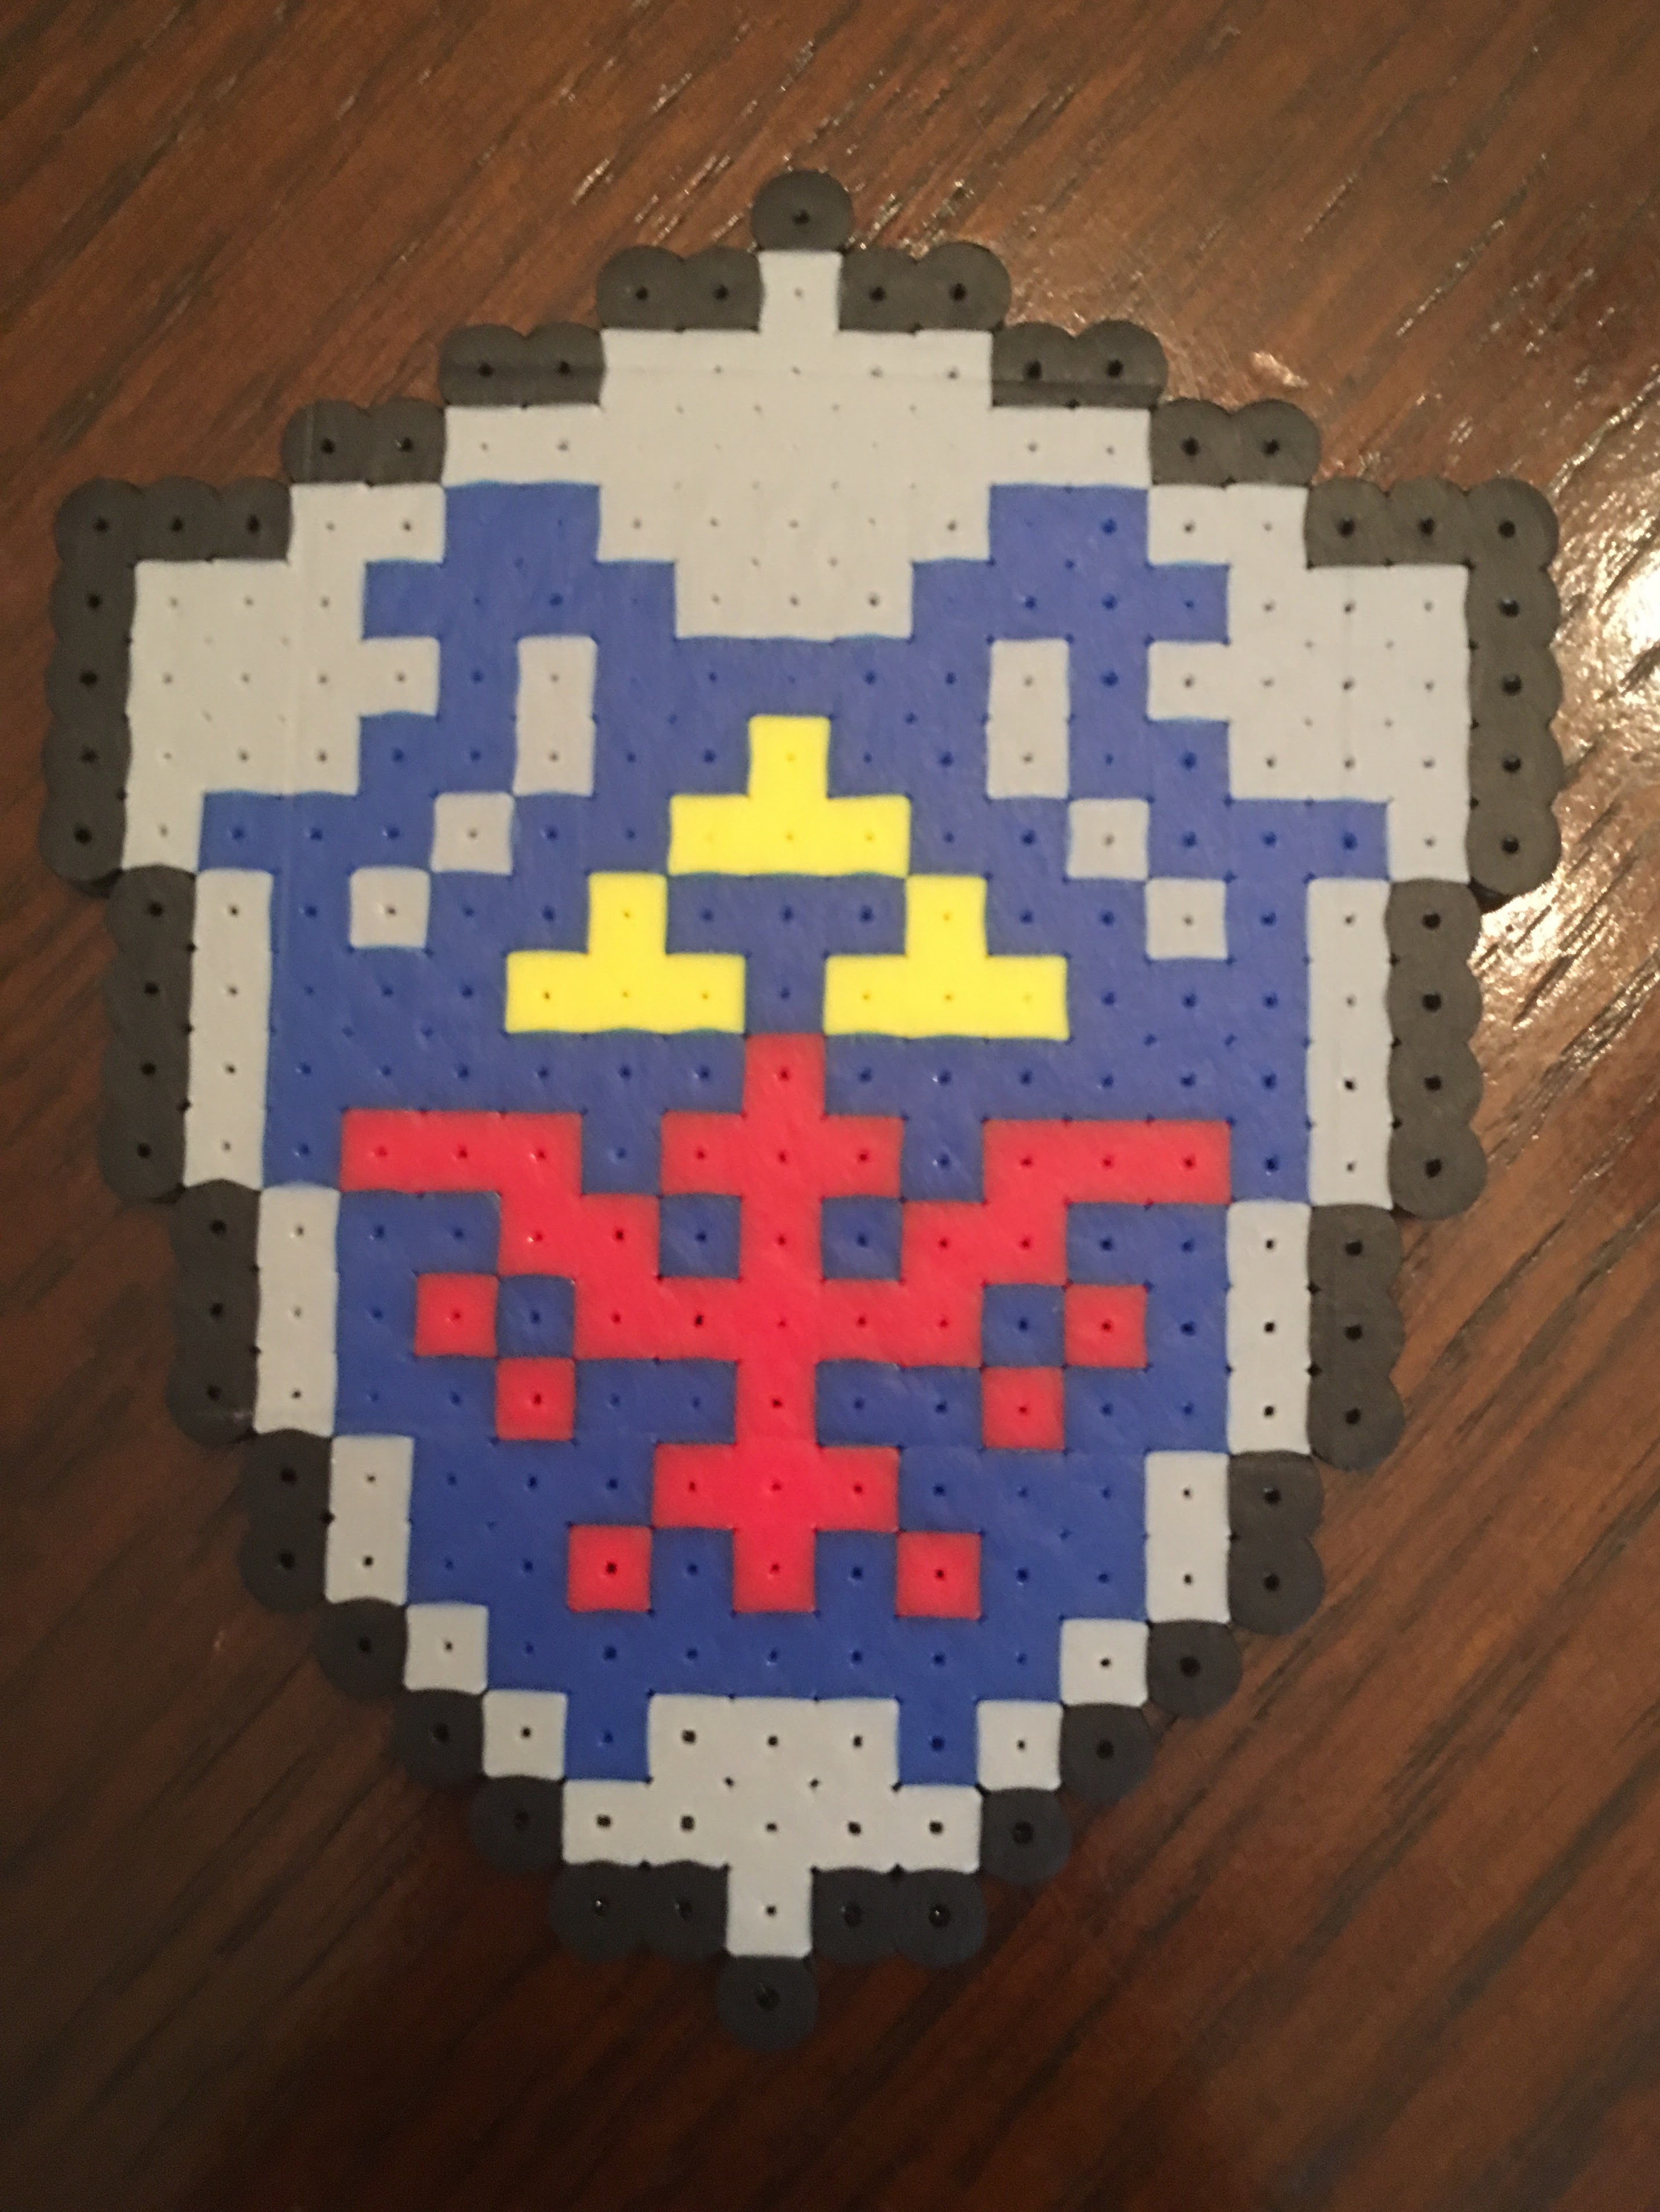
#2 Link’s Shield – pixel inspiration from pixel art by Brik
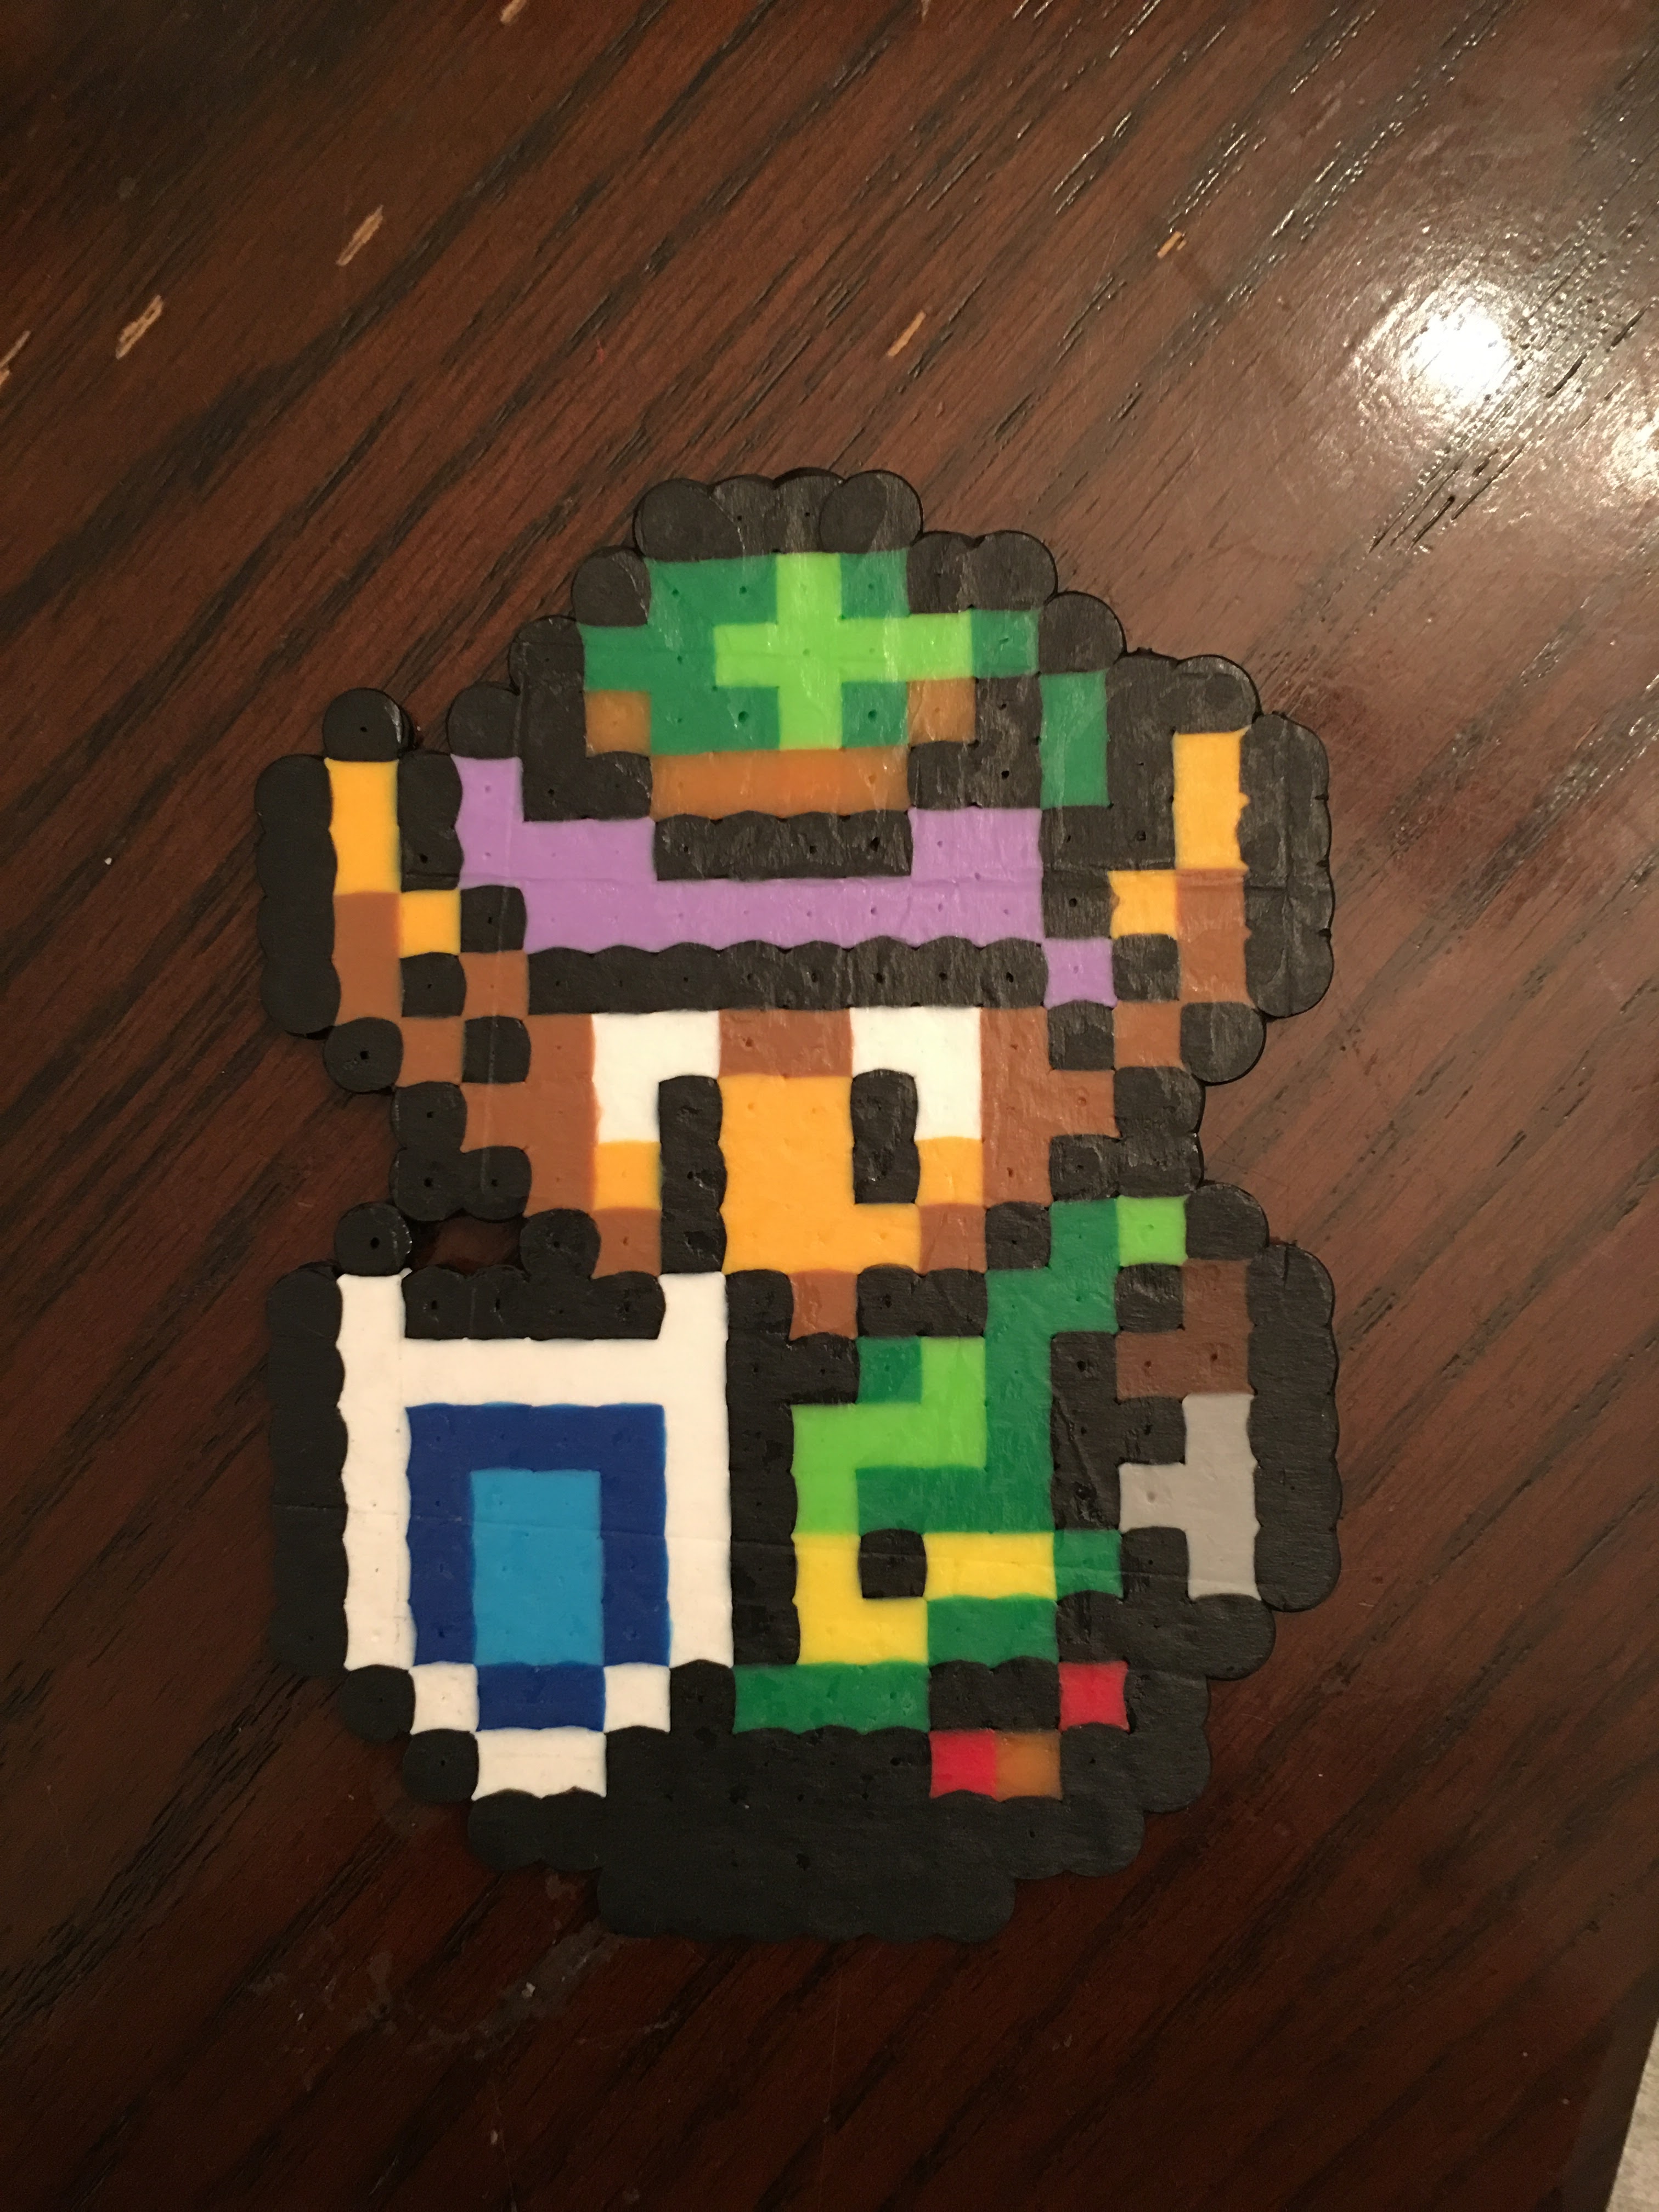
#3 Link to the Past Link- in retrospect, I would replace the top black bead from the right side of the shield with a peach one, as it looks like his eyes are drooping. – pixel inspired by Deviant Art
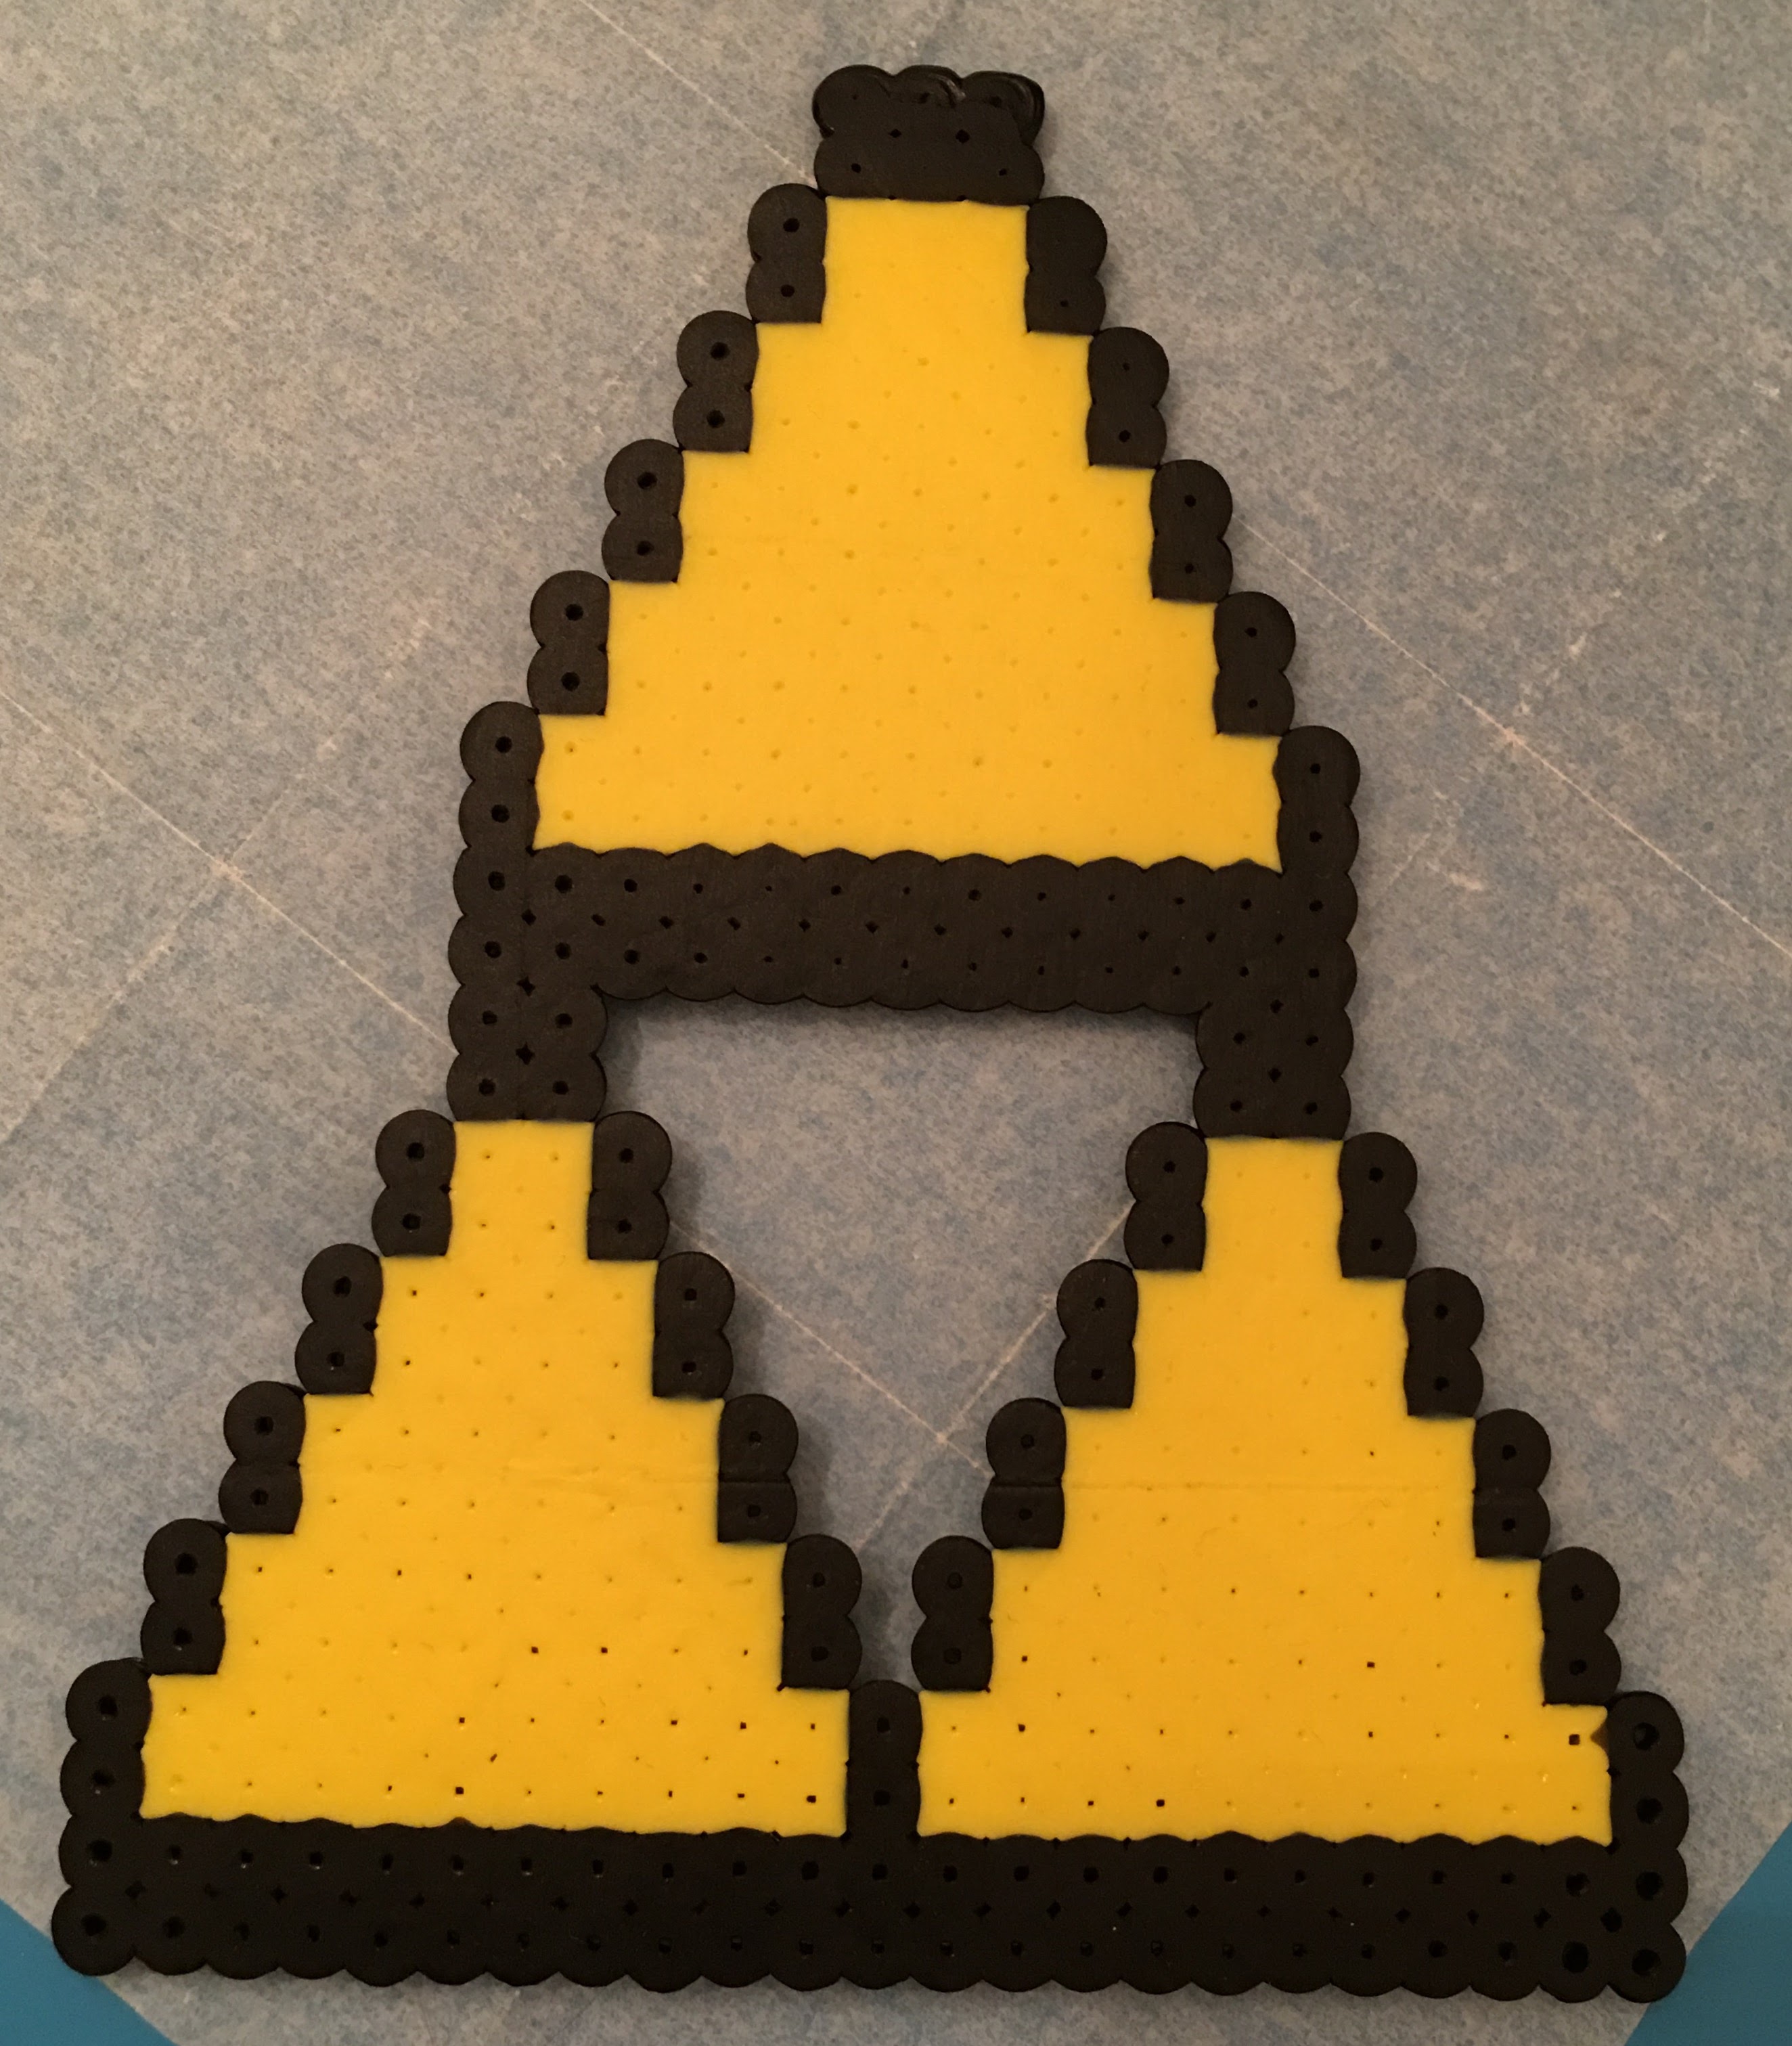
#4 – Chicken from Link to the Past – pixel inspired by Kandi
I then also took this a step further. My daughter and I used this to make a pair of heart earrings out of Mini Perler Beads. She tweaked the pattern a little to make it smaller- however they still came out really neat. Once the pattern was done, we poked a hole in the top, attached a small split ring and an earring hook and ironed. One side I ironed so the colors would blend but the other side I left pixelated to have the best of both worlds. My daughter loves them.
After the hearts, we decided to make Triforce Earrings! Using a modified pattern, we used the same process as above with the hearts. The results are below…
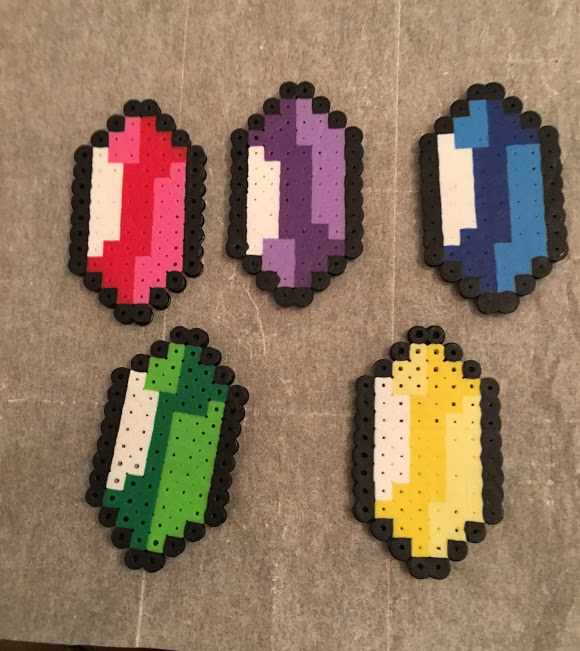
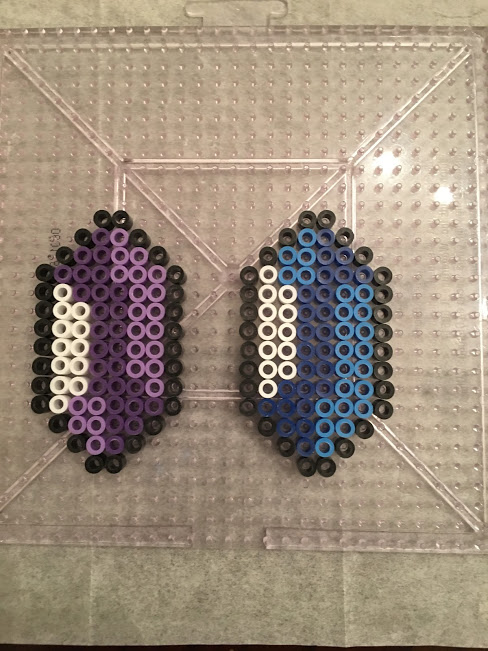
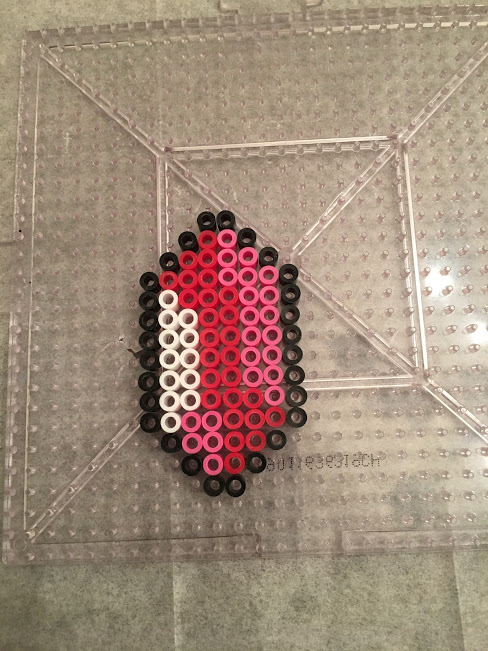
#6- Rupees
Original Design by – CalysDesign. These were fun additions to our Zelda Collection. Used red, pink,, white, light and dark purple, blue and dark blue, green and light green, yellow and pastel yellow with black trim.
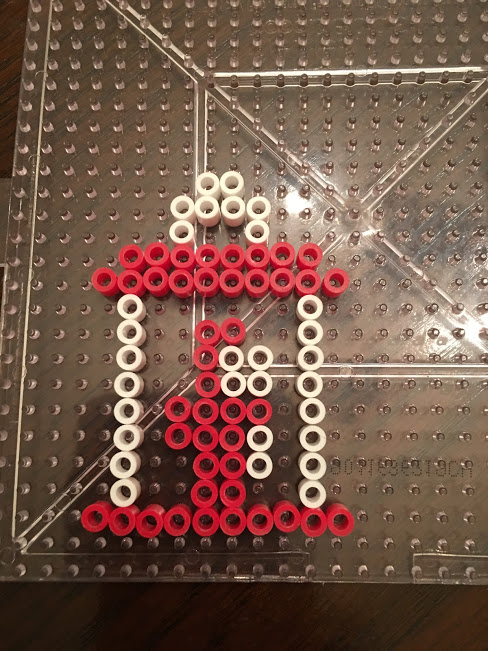
#7 Link’s Lamp
This pattern is designed after the pixelated image of Link’s Lamp. My son used white and red Perler beads to create it. I think if we had to do this one again, we would maybe add another color (black?) around the inside due to the lamp feeling very fragile once ironed.
#8 Zelda Treasure Chest
Original Design by Danny Yama. Chest made from cheddar, red, rust, white and black beads. If you would like a tray of presorted beads, Amazon has a great one here. Or if you like sorting, a 22,000 set here.
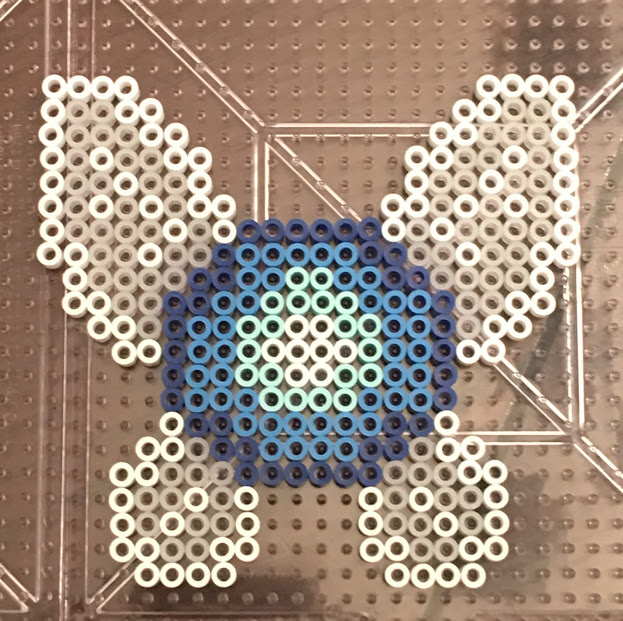
#9 Navi
Original design by molloy-11. Made with dark blue, light blue, blue, white, and gray Perler beads.
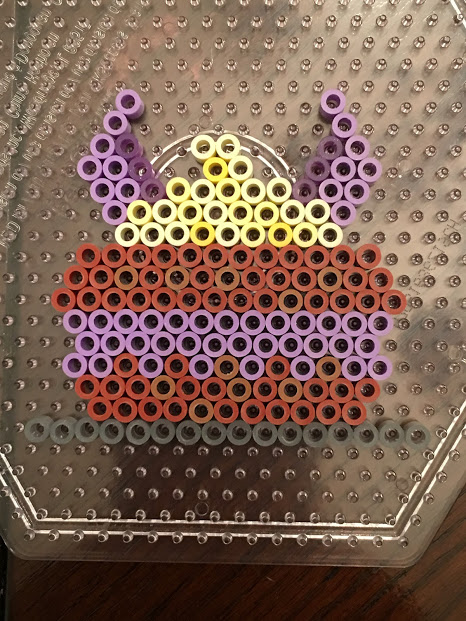
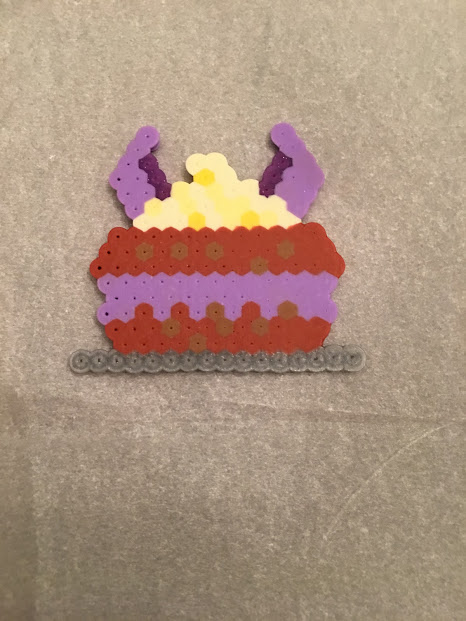
#10 Breath of the Wild Monster Cake
My son’s friend made this from looking at the game. Made with light purple, purple, rust, gray, yellow, white and light yellow Perler beads.
If you would like to check out more Perler Bead Patterns, click on the Menu at the top of the page or click some of the links below.