Posted in Marvel Patterns, Perler Bead Patterns

Discovering Mini-Perler Beads with Avengers

avengers, magnets, mini perler beads
Avengers Magnets made with Mini Perler Beads

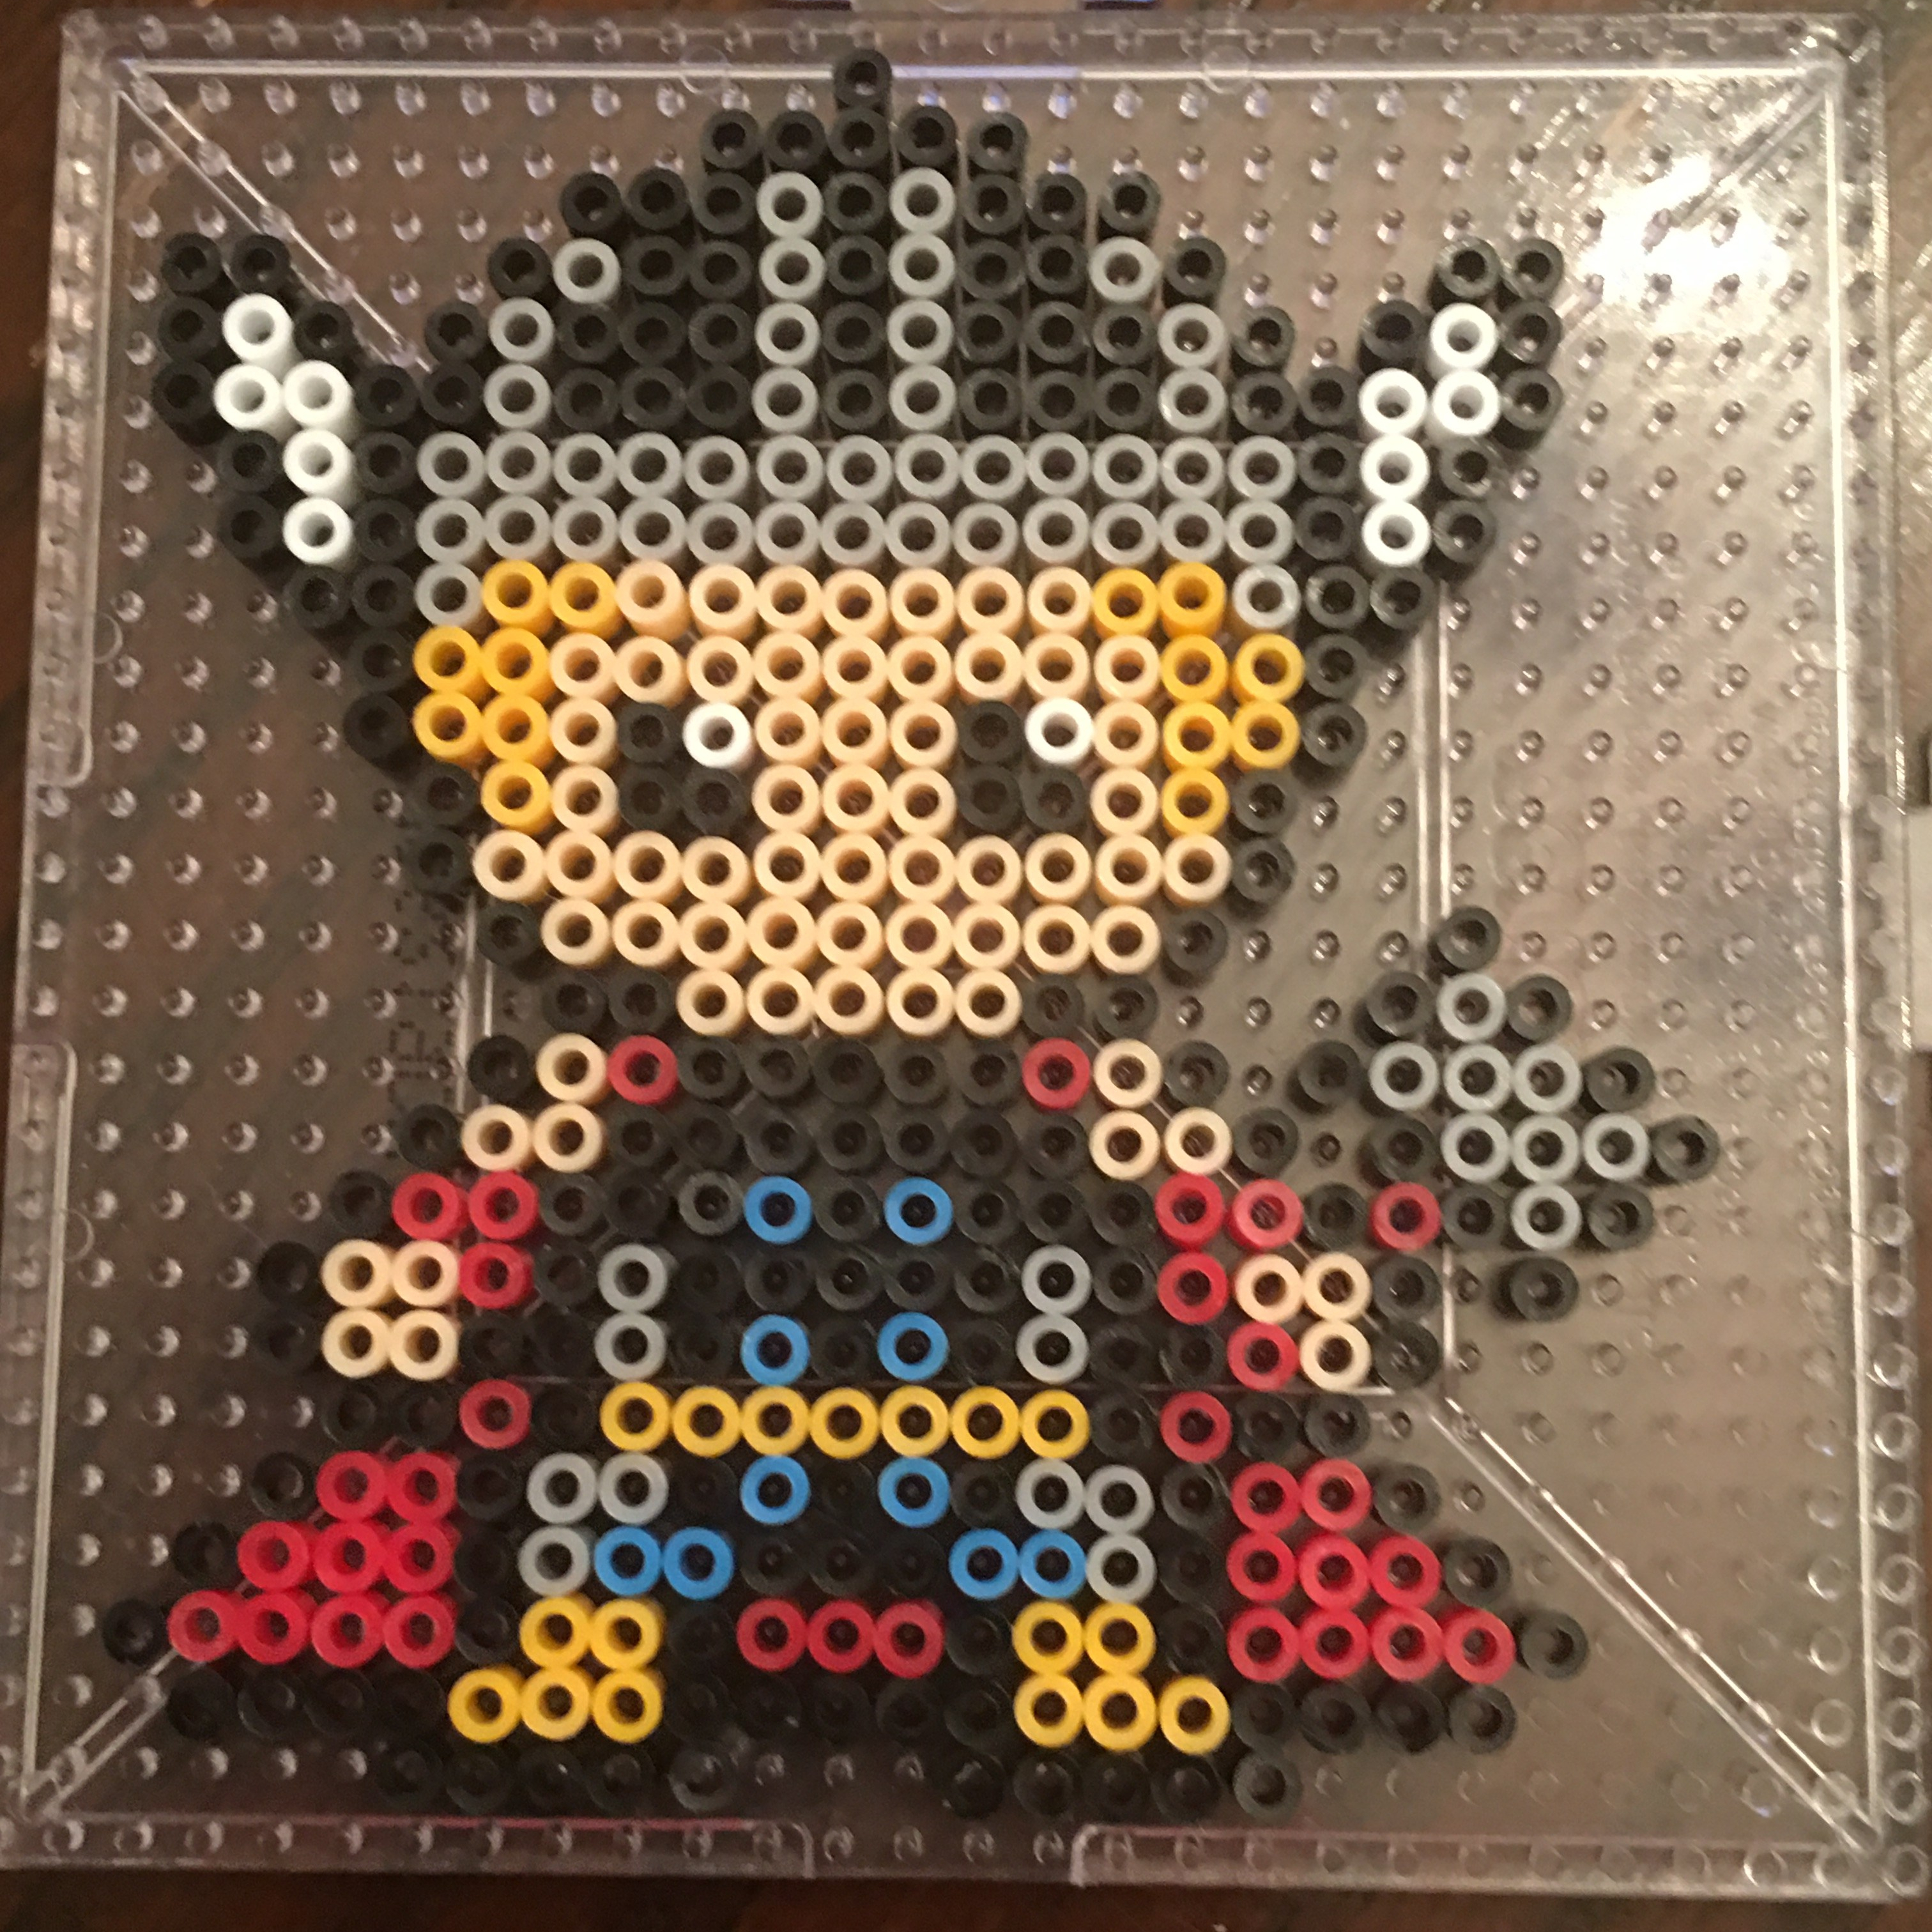
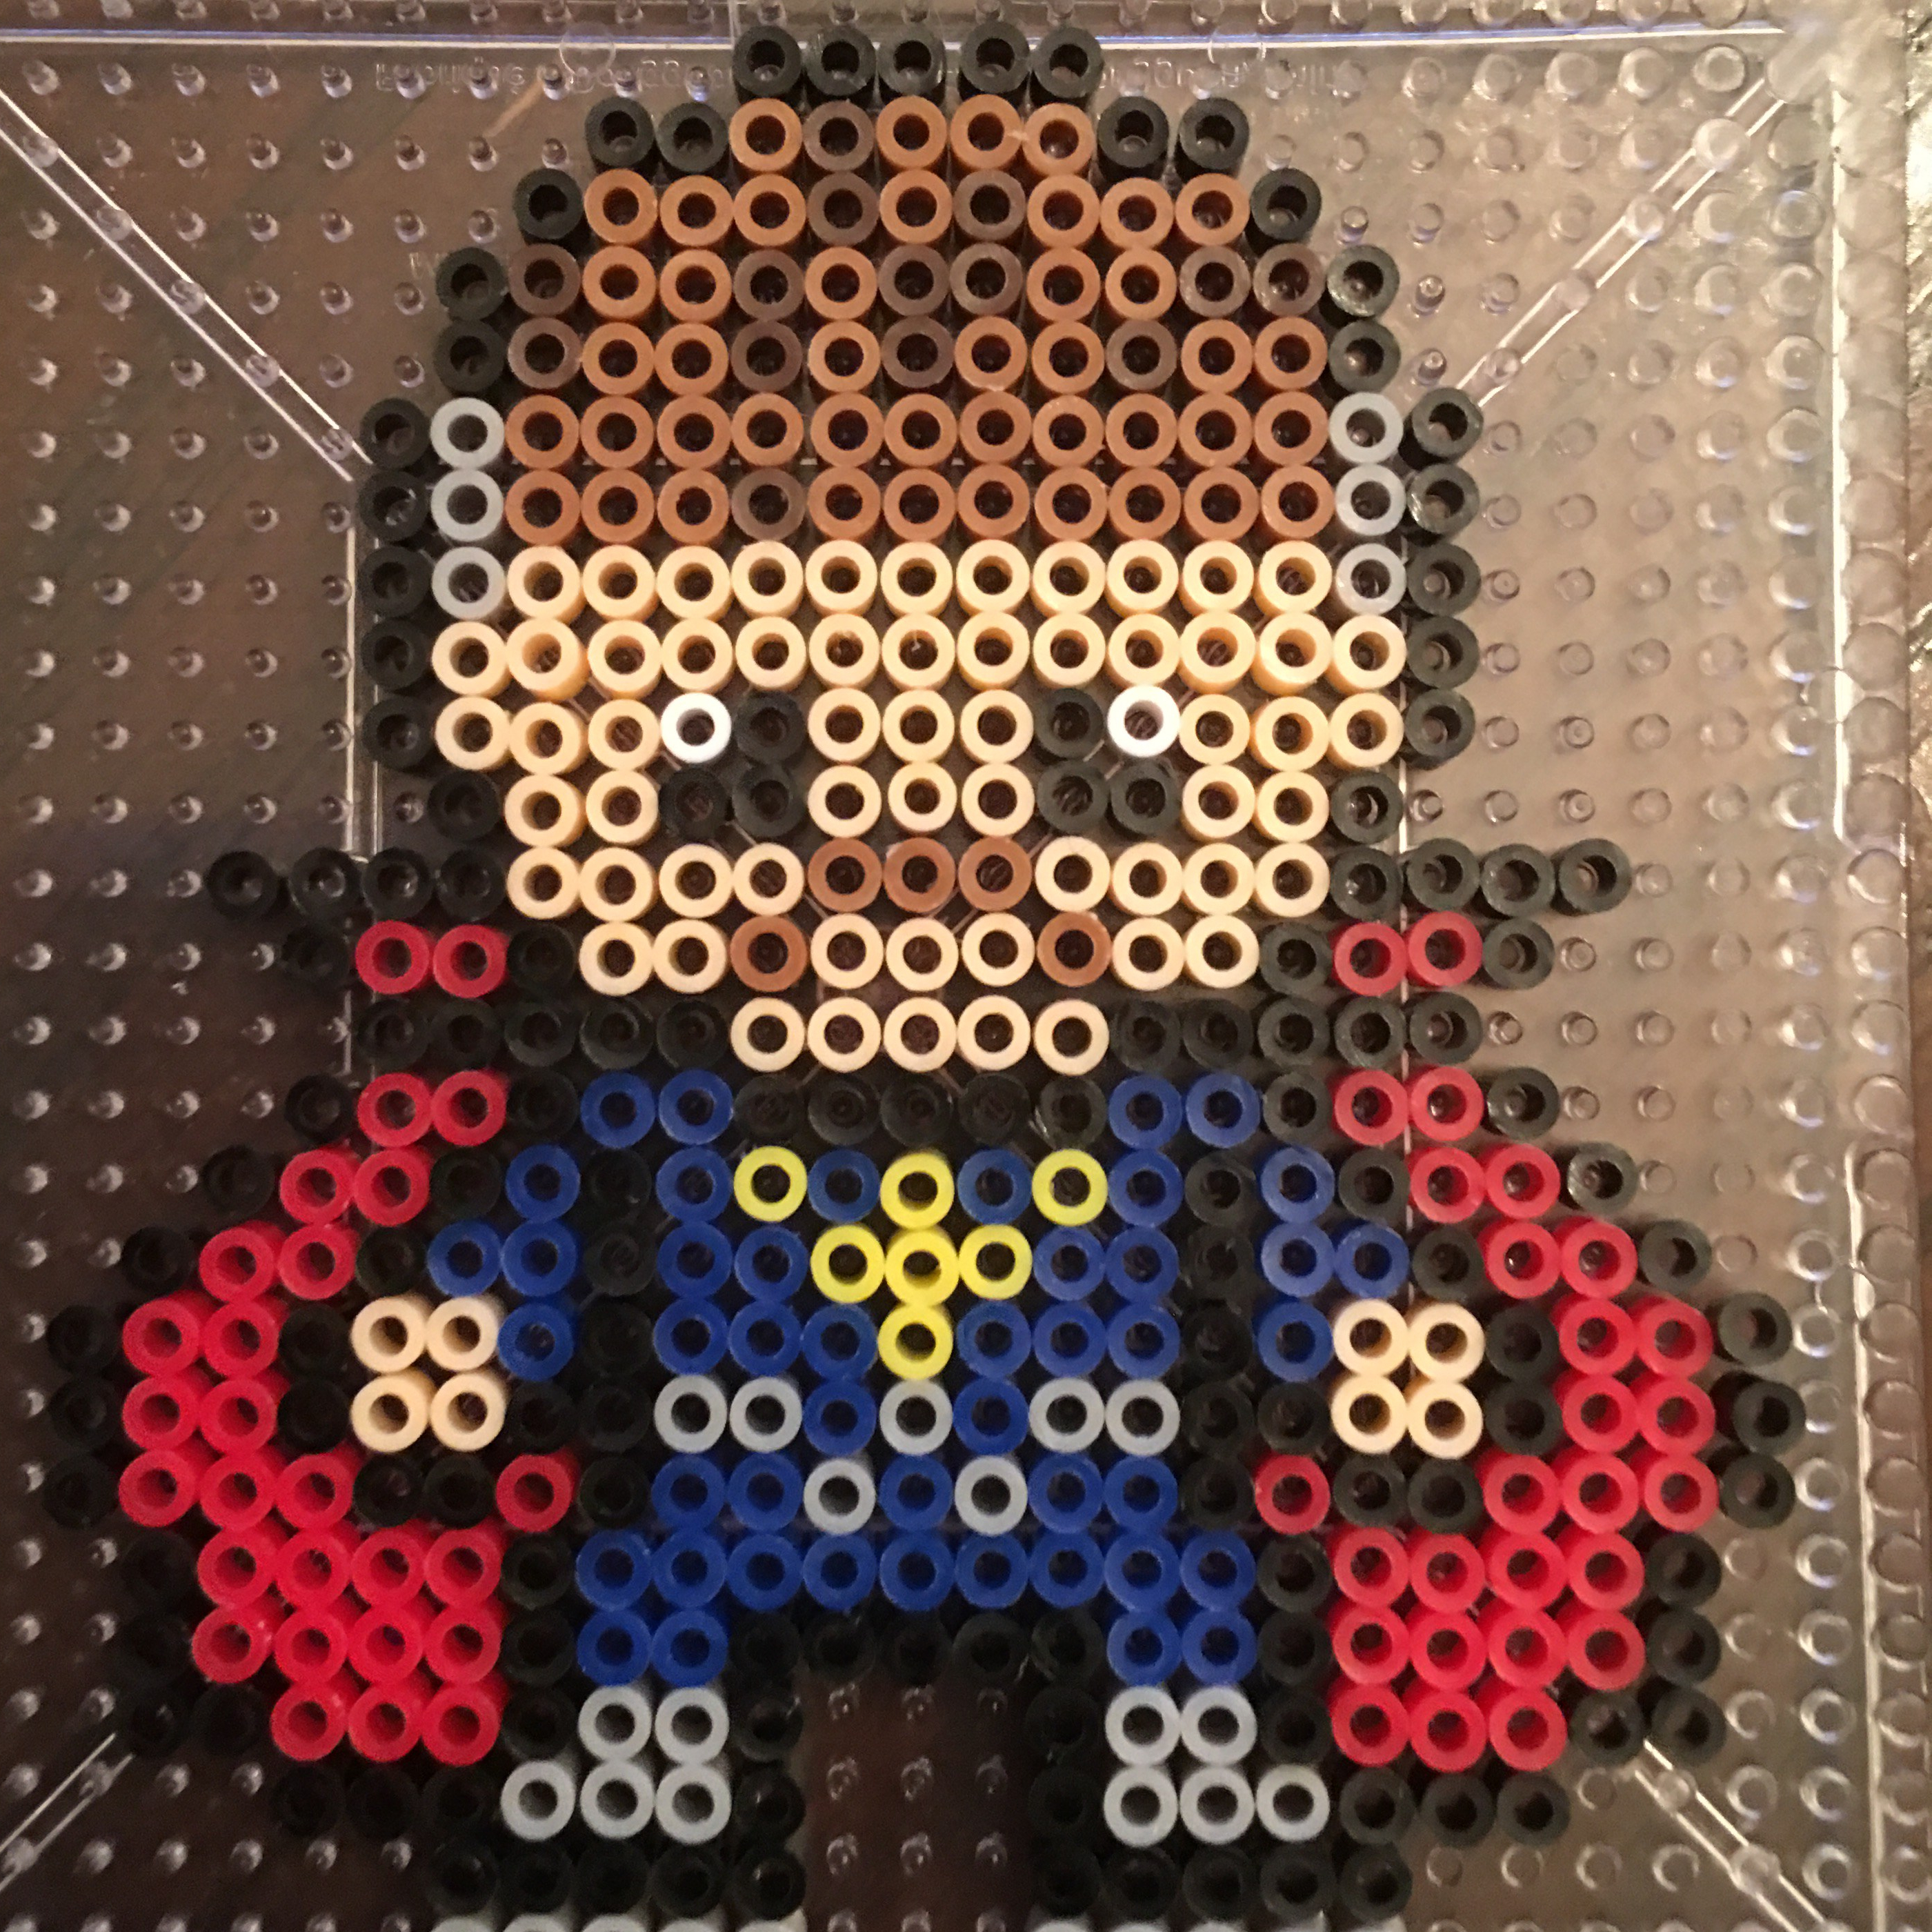
MINI PERLER BEADS!!!! I have recently discovered these little gems and they are super cute and awesome!!! You can still build your characters and other designs out of the classic Perler beads, however these Avenger pieces are only 2 ½ cm high compared to the classic Perler beads which would make them 5 cm tall. (see Iron Man below)

Kandi Patterns is great for discovering or making your own patterns.

Just to give you some ideas on the difference in size between the classic Perler beads and the mini Perler beads…

Iron Man, avengers, mini Perler, classic Perler beads
Iron Man- made with both mini & classic Perler beads to show the difference
Perler, pegboards, mini, classic
Perler Bead Pegboards- Mini Version and Classic regular version

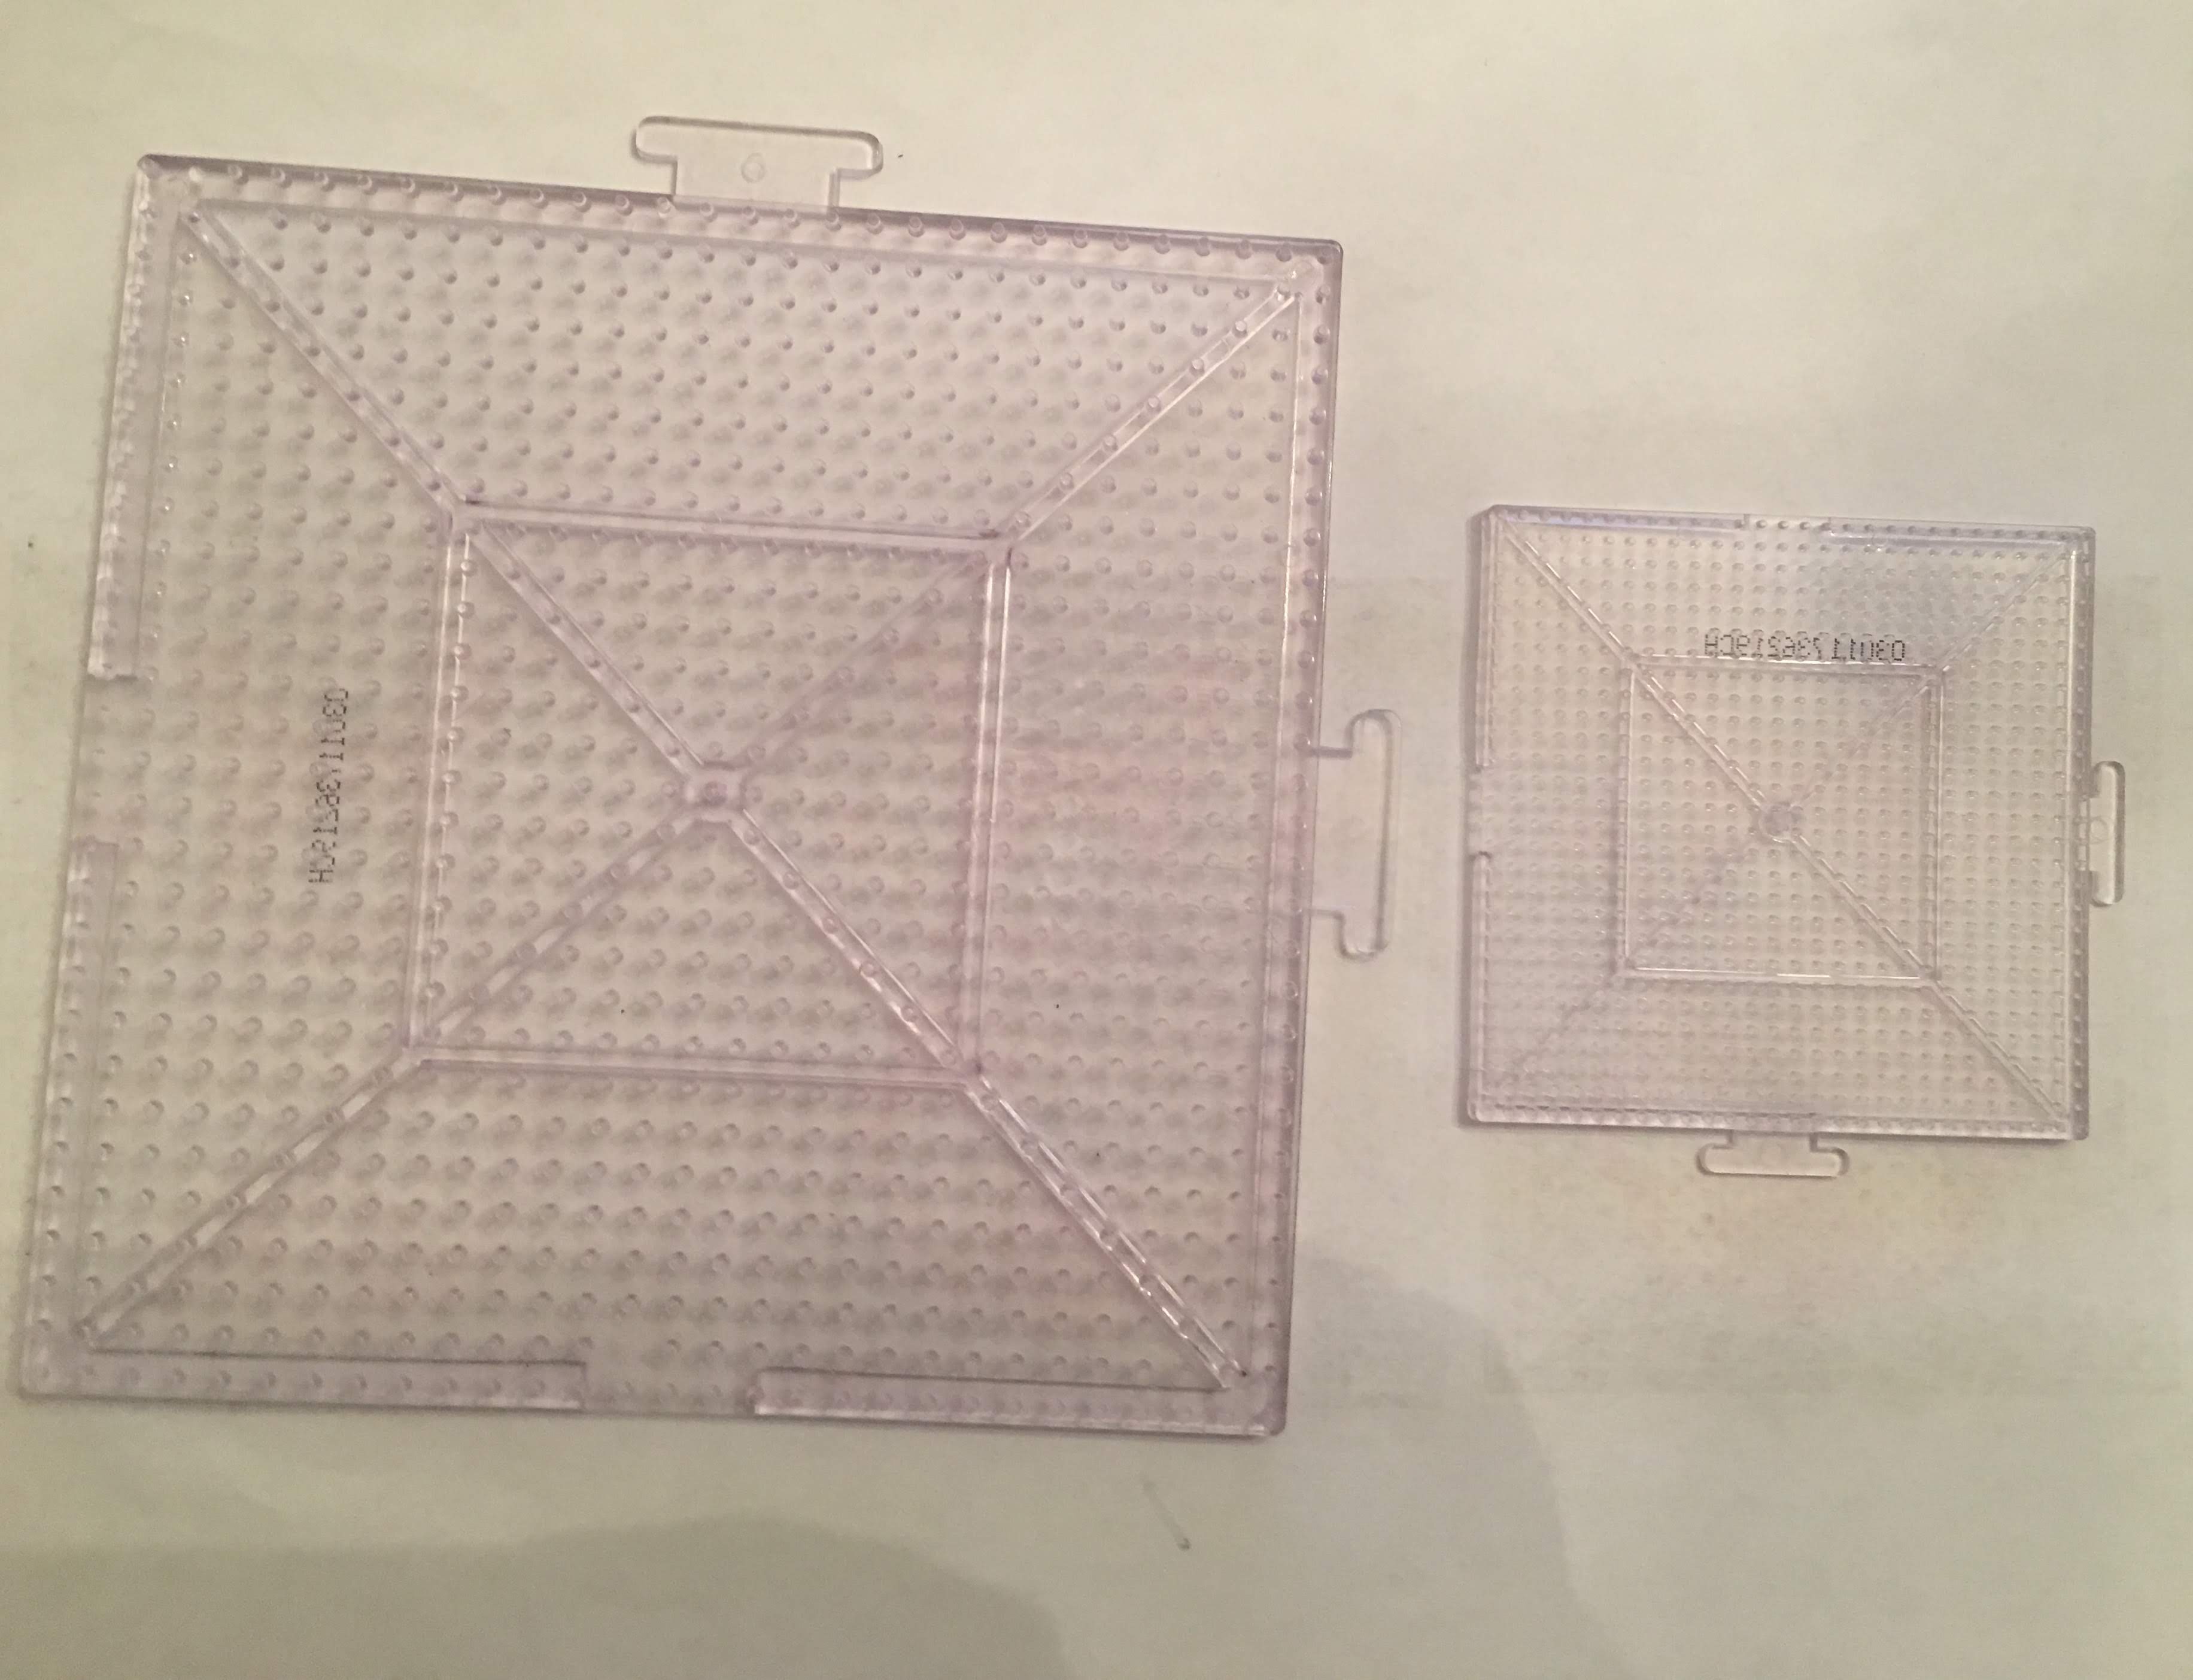
The official Perler site has a great selection of both the classic and mini bead versions. Amazon has 4 trays like the one here, and they have a variety of color selections. The small pegboards are super cute but they do take a little getting used to. The tweezers are definitely a lot sharper and have more of a needle nose look to them. However, I had a blast playing with all of the designs and creating the smaller versions. These smaller characters are super easy to put on a key chain, magnet or a backpack clip and they won’t take up too much space.

The little magnets that I have created above are on my new Etsy store if you would like to purchase a character or a set already made, then please go there. I also have Do it yourself kits which have the beads needed or whole kits that have the beads, a pegboard and an ironing sheet so you can make your own.

However, If you were going to do lots of the mini bead creations, then I definitely recommend buying bulk from Amazon or Perler but if you want to get your feet wet with these mini beads, then the set on my Etsy store may be the way to go. The only thing not supplied are the tweezers.

Either way you do it, the mini versions are super cute. You can try making some of your previous creations with the smaller versions and see what you think. Hope you love them as much as we do!

If you would like to check out some additional Perler Bead Patterns or Projects, click on the Menu at the top of the page or click some of the links below.

Please join our mailing list below to get updates and follow our blog.  Thank you for joining! We promise not to sell or spam your email!

Processing…
Success! You're on the list.
Posted in Candle Making, Projects

Natural Soy Wax Candle Making for Beginners

SUMMER!!! Summer to me means time away from work that I can concentrate on spending time with my kids, taking vacations and completing projects. Projects that involve learning new things that I have always wanted to learn or crafting projects with the kids or just deep cleaning the house.

This summer I decided to learn how to make candles. This was one of the things I have always wanted to learn and decided that this would be the summer.

Scented candles are burnt frequently at my house as we love the smell and look of a burning candle. However, they can become quite costly when shopping at Bath & Body Works, Yankee or other places. So my daughter and I headed to Hobby Lobby.

When we were first started looking through the aisle of candle making supplies, we were very overwhelmed with all of the options and didn’t know where to start or what even to buy to begin. Luckily we found a Natural Soy Wax Candle Making Kit from Country Lane which had all the things we needed to begin making our first candle. (You can also buy this from Amazon)

The kit included…

  • Pouring Pot (for melting the wax and pouring it directly into the glass)
  • 14 oz of Soy Wax
  • 7 oz jar with lid
  • Votive Flower Pot Container
  • 6 Wicks
  • Color and Fragrance (There was a ton of color in mine- I only used 1 out of 9 squares)
  • Instructions
  • 4 Metal Tea Light Cups

All of the supplies were packed nice and neat into the pouring pot. Once we laid everything out, we began reading the instructions. They were very easy to follow. Inside the kit came 9 green coloring block dyes and a 0.5 ounce bottle of pearberry scent. I used the entire bottle of scent but still have 8 of the dye blocks to use for other candles.

The 14 oz of wax that was included made 4 tea candles, the flower pot container and the 7 oz jar candle. I actually had wax left over that I used to top some of my other candles off. We were so surprised at how easy these were to make, especially since this was our first time and we had no idea what we were doing.

This was definitely a great project and I would definitely recommend this kit for anyone who is a beginner and wants to learn. I know after doing this, I can now order wax, wicks and color blocks off Amazon or walk into Hobby Lobby and actually know what I’m looking at in the aisle. We are looking forward to making other types of soy candles and different scents in the future. We have even started saving our glass jars (ex: pasta sauce, pickels, etc) to reuse so we don’t have to keep buying glass containers. No more buying the expensive candles for me!


Posted in Christmas, Perler Bead Patterns

Easy DIY Christmas Perler Bead Ornaments

Want some easy family Perler bead patterns that can easily transform into Christmas ornaments?  Look no further, this family fun craft was easy to make and looks great on the tree.

We used the pixelated images to create the designs on boards, melted the beads and attached a Christmas ornament hook at the top. However, in my newest ones, I have used a ribbon which I attach before I iron. In my Etsy Store and my store, www.galaxyofpixels.com – I have these kits ready to go. You can purchase them for $2 or $2.50 a piece and they have exactly what you need to make these ornaments.

Our results are below.

Christmas Bell with Holly

Bells with holly Christmas ornament made with Perler beads

Christmas Wreath Ornament

Christmas Gingerbread Ornament

Christmas Candy Cane Ornament

Christmas Holly Ornament

Snowman Ornament

Our family loves making lots of Perler crafts.  If you would like to see some other designs, click menu at the top or the links below…

Also, Check our our Etsy Store -GalaxyofPixels!

Christmas Ornament Perler Bead Patterns DIY

Please join our email list to follow our site. We promise not to sell or spam your email!

Processing…
Success! You're on the list.
Posted in Christmas, Perler Bead Patterns, Super Mario Patterns

Super Mario Perler Bead Christmas Ornaments

Capture

Our family is a huge Nintendo fan and our kids have grown up playing all the Super Mario franchise games. This year, the kids had their own tree to decorate and we decided to make some Perler beads ornaments. We are looking forward to making lots of ornaments this holiday season.

In the pictures below, I used a Christmas hook, However, in my newest ornaments, I have used a ribbon which I attach before I iron. In my Etsy Store and my Online Store, www.galaxyofpixels.com – I have several of these kits ready to go with more on the way. You can purchase them for $2 or $2.50 a piece and they have exactly what you need to make these ornaments.

Mario and Luigi in Christmas Stockings

Mario in the stocking! After making Mario, I changed the red to green to create Luigi. When ironing, we left one of the top beads open and not too melted. This allowed us to put a Christmas hook into the hole which helped it fit easily on the tree.

Super Mario and Luigi Christmas Ornaments Perler/ Hama Beads

Red and Green Mushrooms

Same as above- once made, we melted everything but the top bead to allow for the ornament hook.

Super Mario Mushrooms Christmas Ornaments Perler/ Hama Beads

Star and Mushroom Tree

Don’t forget while melting to leave room for the hook.

Super Mario Mushrooms Christmas Ornaments Perler/ Hama Beads

Processing…
Success! You're on the list.

Yoshi Christmas Wrapped Egg!  

This Christmas wrapped Yoshi Egg was super easy to make and looks great as a Christmas ornament.

Super Mario Perler Yoshi Egg Christmas Ornament

Mario Santa

This Mario Santa turned out super cute!  Made with sand, black, white and red Perler beads.  Will also work for Hama or just plain melty beads.

Super Mario Perler Santa Christmas Ornament Hama Melty

If you would like to see some other Super Mario patterns, visit menu at the top of click the links below.

Also, Check our our Etsy Store -Galaxy of Pixels! Sign up for our shop newsletter to receive a 10% off coupon for your next order.

Posted in Perler Bead Patterns, Zelda Themed Patterns

Legend of Zelda Perler Bead Art Scene

Ever wanted a Perler Bead or Hama Bead pattern that you could spend time happily crafting so that you can melt it and put it in a framed picture for the wall? This classic piece is from the Super Nintendo Legend of Zelda – A Link to the Past.

Made with over 3,800 Perler Beads and 6 grids! Original design xpeachart or cocomademosielle depending on which pin you look at.

This one did take a few hours to create. If you recreate this pattern, I would suggest getting a large piece of cardboard or cardboard box to lay underneath the grids.

We used a medium shipping box from Walmart, cut in half like the first picture below. (One box should make two large pieces with two of the sides of the box in each piece.) Then we laid the grids on top of one side. Once the scene was complete and before ironing, we used the masking tape method to tape the entire picture. (If you would like to learn more about this method, Perler has a great tutorial on their site.) Once the masking tape was secure, we were able to fold the top side of the box down and enclosed the grid inside (basically a grid sandwich with the cardboard on both sides). This made flipping the grids so much easier!


I wanted the scene to have the pixel look so after ironing, ours turned out like this..

2017-10-20 22.26.26.jpg

Leave me a comment or picture if you try this one and let me know how yours turns out!

If you would like to check out additional Perler Bead Patterns, click on the Menu at the top of the page or click some of the links below.

Posted in Perler Bead Patterns, Super Mario Patterns

Luigi’s Game Boy Horror from Luigi’s Haunted Mansion made with Perler Beads

Luigi's Haunted Mansion- Gamboy Horror Perler/Hama Beads pattern

Luigi’s Mansion- the Game Boy Horror which Luigi receives in the game from the Professor.  Made with light gray, black glitter blue, white , pink, clear white, light green and light blue Perler Beads.  You could also use Hama or Melty beads as well.  Amazon has a great selection of individual bags of Perler Beads as well as starter kits.

My son’s friend came up with the pattern.  The pattern  below is before we melted it.

Luigi's Haunted Mansion- Gamboy Horror Perler/Hama Beads pattern

If you would like to check out additional Perler Bead Patterns, click on the Menu at the top of the page or click some of the links below.


Posted in Perler Bead Patterns

Nintendo Game Cube Perler Bead Pattern

2017-09-06 17.37.03.jpg

My son’s friend created this awesome Perler bead design to represent the Nintendo Game Cube. He used purple, black, white, orange, and gray beads on a hexagon grid. Once melted, the finished project looked like this… I liked it from both the front and the back sides of the cube.

2017-09-07 07.08.25.jpg

If you like this or want to see something different, please check out some of our patterns and designs…

Posted in Minecraft Patterns

Minecraft Perler Beads

Minecraft Perler Beads Time!!   These are some of the patterns that the kids and I have built that have a Minecraft theme.  This post will be updated as we continue to find and build more patterns. with the same theme.

1. Minecraft Logo with Characters

Original Design by Tristanya.

Top picture is the design with the beads unmelted and the second one is the completed melted project.  We used the masking tape method to pull the project off the grids before ironing.  My son is super excited to hang this in his room. If you need more Perler Beads or grids, Amazon, Hobby Lobby or Joanns Fabrics has some great materials.

Minecraft, Perler Beads, Hama, Pattern, craft, kids
Minecraft Perler Bead Design Melted

2.  Creeper

Original Design- Kandi Patterns. Made with green, black, light green and white beads.

3.  Diamond Sword

Original design- friendship-bracelets.net.   I extended the pattern just a bit to make it a little longer.  Used evergreen, light blue, blue, light brown, brown, and glitter blue.  Could definitely use different colors, esp for the evergreen hilt.

4.  More Minecraft Patterns Coming Soon

If you would like to check out additional Perler Bead Patterns, click on the Menu at the top of the page or click some of the links below.

Please join our mailing list below to get updates and follow our blog.  Thank you for joining! We promise not to sell or spam your email!

Processing…
Success! You're on the list.
Posted in Perler Bead Patterns, Pokemon Patterns

Pokeballs, Great, Ultra and Original Perler Bead Patterns

Its Summertime which means more arts and crafts, more Perler Beads, more games and just more fun!  My kids had so much fun working on these patterns.  Once the designs were ironed and complete, my youngest son played an entire game pretending to catch Pokemon outside with all the different Pokeballs he created.

The patterns are below.  If you need additional Perler beads, Amazon has a massive 22,000 bead jar that you have to sort here.  OR if you would just rather have them presorted for you, then there is also a smaller set, which has only 4000. Not very many in that set, but they are presorted which will save you lots of time.

To make the designs…

Using either the circle or grid templates, design the patterns.  Then place a sheet of parchment paper over the design.  You can use special paper by Perler or honestly just grab a sheet of parchment paper from your kitchen and that will also do the trick. Then simply grab a household iron and melt the beads together.  This shouldn’t take longer than 10 -20 seconds on each side.

 Note: When melting them, feel free to melt them for however long works for your family. We used a full melt in this version, (where the colors blend completely together) but we also like to iron them lighter to give them a pixelated look.  Both versions will look great, no matter how you melt them!

The Original Pokeball using the circle template is found below.  The circle template, along with a few additional fun templates, can be found on Amazon or at your local Hobby Lobby or Joanns.   You can also make additional patterns and additional Pokeballs by just changing a few of the colors.  Maybe your child would like to create his/her very own special ball.

Using the grid instead of the circle template….

Great Ball using the circle template….

Ultra Ball using the circle template…

If you would like to check out additional Perler Bead Patterns, click on the Menu at the top of the page or click some of the links below.

Posted in Perler Bead Patterns

Back to the Future Perler Bead Patterns

Back to the Future, Perler Beads, Marty, Doc, DeLorean
Marty, Doc & the DeLorean

Back to the Future is my husband’s all time favorite movie and the kids love it also.  When we came across Perler Bead patterns of Doc and Marty, I just had to build it!

Special thanks to the original poster of this picture which inspired us.  Grids and Perler beads can be found at Amazon here – grids or perler beads


We like our beads a little more heated to give it the blended effect instead of the beaded effect.  However, whichever way you choose, they will turn out amazing!

Marty

Doc


Of course, the DeLorean

These were super fun to build and only took about an hour or so for all three.  The DeLorean was definitely the hardest, however it was super fun.  They now hold a nice place of honor in our Perler Bead Collection!