Posted in Scout Recipes

Scout Banana Boats Camping Foil Pack

Looking for an easy treat to make while camping?   An ooey, gooey, easy treat?  Then Banana Boats may be the way to go.  

banana boat, foil pack, camping, Girl Scouts
My daughter likes hers lightly melted

Ingredients

  •        1 banana per person (may cut in ½ if smaller portion is required)
  •        Mini marshmallows
  •        Chocolate, butterscotch, or other chips

Equipment

  •        Sharp Knife
  •        Aluminum Foil (Reynolds’s Heavy Duty)
  •        Potholder

Directions

Two different ways to do this-  One is to cut a wedge out of the top and use it as a cover for your boat. (Works great when you have a ½ piece of banana)

banana boat, sliced banana
The full banana cut with a slit down the middle.

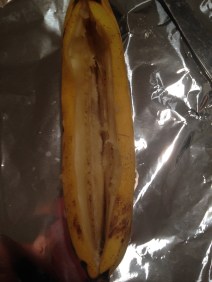
2nd way is to use whole banana and make a slit  from top to bottom.


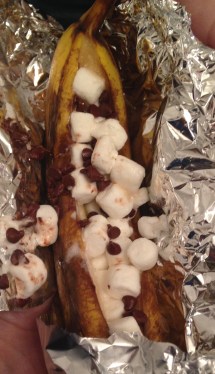
Whichever way you choose- the next step is to pack the banana with marshmallows and chocolate chips

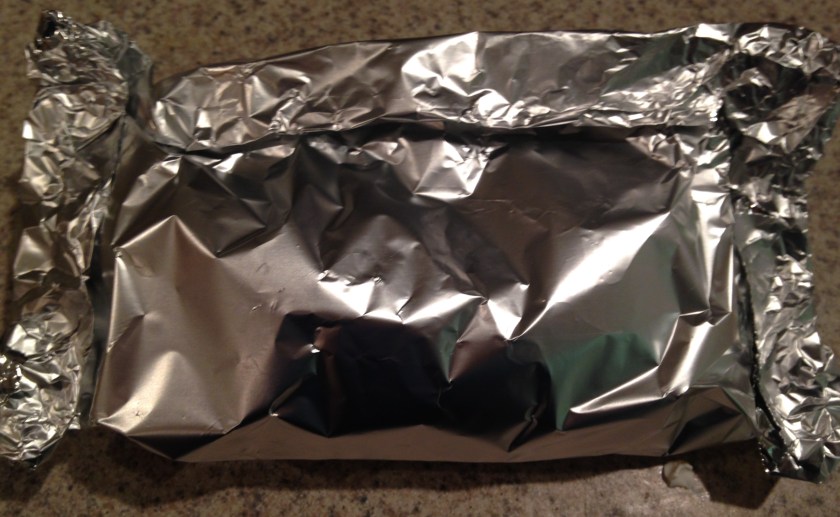
Finally, Wrap banana drug store style and cook over coals long enough to melt chips.

foil pack, banana boat, camping food
Drug Store Style Wrapped (throw back name to an earlier age??)


You can use all kinds of variations to this simple recipe.   I use Enjoy Life chocolate chips due to my son’s food allergies.  However, you are only limited to your imagination.  Enjoy!

Posted in Girl Scout Crafts

Cinnamon Honey Butter Gift

Looking for a fun and easy Holiday gift or something to give a teacher, hostess or co-worker.  

This super easy recipe was fun and my kids even helped.  

2015-12-24 16.46.09
Easy Christmas gift of Cinnamon Honey Butter for friends & family.

I started by using a recipe from allrecipes.com.  

Ingredients:

  • ½ cup confectioner’s sugar
  • ½ cup butter
  • ½ cup honey
  • 1 teaspoon cinnamon

Blend everything together until whipped (about 3-5 min) Tastes amazing but if it is too sweet, you can make some using pumpkin pie spice.  YUM!

Makes about ½ pint.   

Gift Ready

  • To make it gift ready, my daughter traced outlines of the top on the back of wrapping paper – then cut it out and glued it on the top of the jar using hot glue.
2015-12-24 14.01.09
My daughter’s traced circle from the jar lid
2015-12-24 14.01.13
Lid – after hot gluing the wrapping paper to the top

-To make the top of the jar complete, we used hot glue and some ribbon to wrap the top of the jar.  

-After pouring the butter into the jar, using a spatula, we added the top of the jar, a tag that said Cinnamon Honey Butter and it was complete.  
We made several of these batches using to give to friends and family.  So far they have been a big hit!  Next year, we are going to try to make these in our older Girl Scout troop.  Should be great!!  

Posted in Girl Scout Camping

DIY Camping Paper Towel Holder

Tired of your paper towels rolling around while camping?  Tired of picking them up off the ground or running to catch them when the wind blows?  Left your nice store bought holder at home?

Paper Towel Holder
Girl Scout DIY paper towel holder for camping.


Our Girl Scouts decided that a quick solution uses only string and a stick. They were tired of the above problems and dirty towels, so they found a solution.  They used a long stick, slid the paper towels on the rod and used string to tie up the ends to the top of the kitchen tent.  Now no more running after the towels.  They were super proud of themselves for coming up with such an easy solution!


Posted in Girl Scout Crafts

Scout Candy Cane

Last week, we were looking for another easy Christmas craft that our older Girl Scouts could do and came across this in Hobby Lobby. I love easy, fun crafts that the girls can do in a meeting or less and this was no exception.  

Candy Cane


You could very easily buy all the parts to this or possibly may have them on hand.  However, if you’re like me and looking for something to add at last minute, Hobby Lobby sells a box with all of the pieces included for 24 candy canes.  With Christmas sales at 50% off, I bought the entire set for $4.00.  If you don’t have a Hobby Lobby near you, I found a similar set with different colors (makes 16) on Amazon located here.  


Materials Needed

  • 27 Red beads – the beads slide together and remind me of dog bones
  • 27 white beads – same as red
  • 1 piece of wire
  • wire pliers
  • 1 piece of ornament string for hanging – any string will do

Instructions

  1. Take a piece of wire (about 8 inches) and use the needle nose wire pliers to form a loop at the bottom so your beads don’t fall off.
  2. Give each girl 27 white beads and 27 red.  Have them alternate them in a pattern.
  3. After the beads are attached, use the pliers to curl the opposite end.
  4. The girls can shape the their wire into a candy cane shape, add a string for hanger and Voila! – an ornament ready for hanging.

For our Brownies, I cut the wire and curled the end so they only had to put the beads on in the correct pattern.  Once they had strung the beads, we then assisted them in curling the other end.   

For our Juniors & Cadettes, we let them cut their own wire and do all of the work.  We just assisted if needed.

The result – a super cute candy cane that they could hang on their tree that night.  Even our older 8th grade girls, liked this and several asked if they could do more small crafts.   

The whole craft took about 15-20 minutes for everyone to finish.  

Posted in Daisy/Brownie Crafts, Girl Scout Crafts

Daisy/Brownie Reindeer Ornaments

A couple of weeks ago, my co-leaders and I were looking for some fun, easy ornaments for our Daisy and Brownie Girl Scouts to complete.  Our girls had 2 ½ hours to go to 10 different stations making crafts to take home – this was called a Make and Take Workshop.  

 While researching, we came across this great site called littlebitfunky.com in which she had made these adorable reindeer ornaments.  (check her out for her version and a few different variations) We decided to try them out with a few modifications.  The result: an easy, cheap, awesome craft that our girls and parents loved.

A few of the finished products…

IMG_5556

The only things we needed were some brown paint, a black Sharpie, red sticker gems (original was done with red paint) and an ornament for each girl.  Sharpies we had, brown paint was $.50 at Walmart, red gem stickers were $1.99 and the ornaments were only $3.00 for 12.  So far, so good!

How to make it

  1. The girls wrote their names and the year at the bottom of the ornament.  (Great keepsake for parents or grandparents)
  2. Next, they put their thumb in the brown paint and added their print to the ornament.  I had them do it thick since we were only adding 1 print.
  3. Their ornaments were allowed to dry for about 10-15 min.  Once dry, they added the antlers, and a red gem to stand for Rudolph’s nose.

They looked super cute and the girls couldn’t wait to put them on their tree.  


Special thanks to littlebitfunky.com for the original idea.

Posted in Scout Recipes

Caramel Apple Dump Cake

Looking for an easy dessert to make while camping?  Look no further because this recipe is one of our scouts’ favorite and very easy for them to prep. It’s a twist on the old favorite Apple Dump Cake.

Caramel Cobbler

Before we get started, remember to follow all safety rules and outdoor training guidelines.  For Girl Scouts, only certain ages are allowed to handle the fire and the charcoal part but all levels can complete the prep.  I usually have the girls prep in groups of 4.

To get started: you will need a few ingredients and some equipment.   

 Food Items Needed

  • 2 cans of Caramel Apples
  • 1 – 2 boxes of yellow cake mix (depending on preference)
  • 1 stick of butter

 Equipment Needed

  • 1 Dutch Oven     
  • Charcoal Chimney
  • Aluminum Foil  
  • Knife/Cutting Board
  • Charcoal     
  • Rubber Spatula
  • Can Opener

   Time to Cook!

  1.  Start heating up the Charcoal briquettes in the chimney.  We usually use 24 briquettes for a 12 qt oven.
  1. Line the Dutch Oven with Aluminum Foil and Spray (When our Daisy girl scouts complete this step, I always look over it making sure there are no holes in the foil.  The foil helps to make it a super easy clean up.)
  1. Pour both cans of apple filling into the Dutch oven- layer it evenly usually the spatula
  1. Pour the cake mix over top of the apples – Spread evenly (Depending on your scouts, mine like to use two boxes of cake mix.  It makes it a little taller and thicker but I think the taste is really the same as one)
  1.  Slice the butter and checkerboard the butter over the top ( Two of the girls usually slice the butter while the other two lay it out in a checkerboard pattern over the top)  Put the lid on the dutch oven.  
  1. Carry the Dutch oven to the fire ring and apply your piping hot briquettes with 10 on the bottom and 14 on the top.  That works great for our 12 qt but feel free to adjust your numbers depending on the size of your oven.  Each briquette is about 40 degrees. Dog food tin plates work great as a place near the fire to set the Dutch oven.    

7. Cook for about 40-45 minutes for 1 box of cake mix.  For 2 boxes, it usually takes about an hour.

Once removed, allow it to cool.  You can serve it warm or even have the girls make ice cream in a bag to go with the cobbler.   Enjoy!


(If you have some great variations of this recipe, let me know.  We always have a great time trying out new, easy recipes at camp.)