Posted in Kahoots

Decimal Place Value Kahoot

This Kahoot was created to help my 5th grade math students review place value with decimals.  It was a warm up game and the students worked in pairs with ipads.  It was my first time to creating one and the kids did great.

Check out this #Kahoot called ‘Place Value Decimal Warm Up’ on @GetKahoot. Play it now!

https://play.kahoot.it/#/k/701560ef-008d-43dc-b7e9-0710b3b74ede

If you’ve never used a Kahoot before, please check out my Kahoot Introduction.  If you would like to see some other kahoots, I have several with different topics that I made under menu, Kahoots  or just click anything below..

Posted in Kahoots

Kahoot Introduction

Kahoots are a great way to get students engaged and having fun in math or other subjects.  On slideshare.net, I found this great picture that explains what a kahoot is pretty clearly.

calum-thompson-mmu-using-kahoot-as-a-classroom-response-system-2-638

Kahoot: an interactive quiz game for all subjects of learning.  Teachers can create their own quiz by typing in questions relating to their topic or subject.  The kids then use an ipad, computer, phone, or tablet to go http://kahoot.it . You can even create social games to play at a party. If you don’t want to create your own, but play one someone else created, you can do that also.  They have thousands of public Kahoots ready to go.  The game is highly addictive and engaging.

Kahoot gives each lesson a pin number when the game is started.  The students type in the pin and they are automatically in the game.  They compete against each other for higher points and can even compete against themselves in ghost mode.  You can even have the kids type their names and download a score to put in your gradebook. 

I have created several of these Kahoots for use in my math classes.  I will post a few of these on a different post that is free to use in your class as a review or fun quiz for the kids.

If you would like to sign up for a free Kahoot account or learn more information, go to http://getkahoot.com

If you would like to see some other awesome games I use in my classroom, click any of the links below, or go to menu, Math is Awesome, Math Games.

If you would like to see some of my kahoots that I have used in the classroom, go to Menu, Kahoots or click below..


Posted in Girl Scout Crafts

Scout Candy Cane

Last week, we were looking for another easy Christmas craft that our older Girl Scouts could do and came across this in Hobby Lobby. I love easy, fun crafts that the girls can do in a meeting or less and this was no exception.  

Candy Cane


You could very easily buy all the parts to this or possibly may have them on hand.  However, if you’re like me and looking for something to add at last minute, Hobby Lobby sells a box with all of the pieces included for 24 candy canes.  With Christmas sales at 50% off, I bought the entire set for $4.00.  If you don’t have a Hobby Lobby near you, I found a similar set with different colors (makes 16) on Amazon located here.  


Materials Needed

  • 27 Red beads – the beads slide together and remind me of dog bones
  • 27 white beads – same as red
  • 1 piece of wire
  • wire pliers
  • 1 piece of ornament string for hanging – any string will do

Instructions

  1. Take a piece of wire (about 8 inches) and use the needle nose wire pliers to form a loop at the bottom so your beads don’t fall off.
  2. Give each girl 27 white beads and 27 red.  Have them alternate them in a pattern.
  3. After the beads are attached, use the pliers to curl the opposite end.
  4. The girls can shape the their wire into a candy cane shape, add a string for hanger and Voila! – an ornament ready for hanging.

For our Brownies, I cut the wire and curled the end so they only had to put the beads on in the correct pattern.  Once they had strung the beads, we then assisted them in curling the other end.   

For our Juniors & Cadettes, we let them cut their own wire and do all of the work.  We just assisted if needed.

The result – a super cute candy cane that they could hang on their tree that night.  Even our older 8th grade girls, liked this and several asked if they could do more small crafts.   

The whole craft took about 15-20 minutes for everyone to finish.  

Posted in Lego Birthday

Lego Birthday Party Food

So.. Your child wants a Lego Birthday party and you need some food.  Here are a few of the ideas that I used.  I hope they will be useful.  

2015-11-22 14.25.03

Lego  Brownies

These brownies were made from a box mix (nothing too fancy), topped with chocolate frosting and M & M’s upside down to form the studs of the Legos.  My son and I made different sizes so we could have 2 x 3 brownie bricks and 1 x 3 bricks.  

Stud Bowls

These bowls full of Lego studs were colored Skittles.  We bought a big bag from Sam’s club and my son had fun sorting them into the bowls by color.  The last bowl was some Rainbow Twizzlers cut into half to add to the color.  

Chu Jellies

My son wanted a Nintendo theme incorporated, as he is always building Nintendo characters out of Legos.  This is a Zelda Windwaker throwback where each of the jellies in the cups were Chu Jellies.  (Plus the color scheme looked great with the Legos.)


2015-11-22 14.25.10

Gummy Candy

These were a huge hit.  I bought Lego molds from the Lego store (you can also get them online at Amazon and Ebay) and followed a great tutorial from Grant Thompson.  His youtube tutorial is below.  I used Jolly Rancher Jello to give it a little extra flavor.  The candy apple was my favorite!

https://www.youtube.com/watch?v=n3_dV-e4d9c

Cheese Crackers

The easiest food item of all.  Slices of cheese on top of rectangular club crackers.  The result- small blocks.


2015-11-22 14.25.14

Lego Cake

This one was interesting and fun to create.  My son has food allergies so I had to substitute ¼ cup apple sauce for each egg.  The result was that it fell apart pretty easy.  However, if you follow the Betty Crocker recipe for the cake- you should have better luck.  The Youtube link for their tutorial video is below.

https://www.youtube.com/watch?v=Kc_11rRzSy0

Napkin & Silverware Containers

My son built these holders out of Legos.  I sanitized them and put 3 different colors to blend in with everything else.  

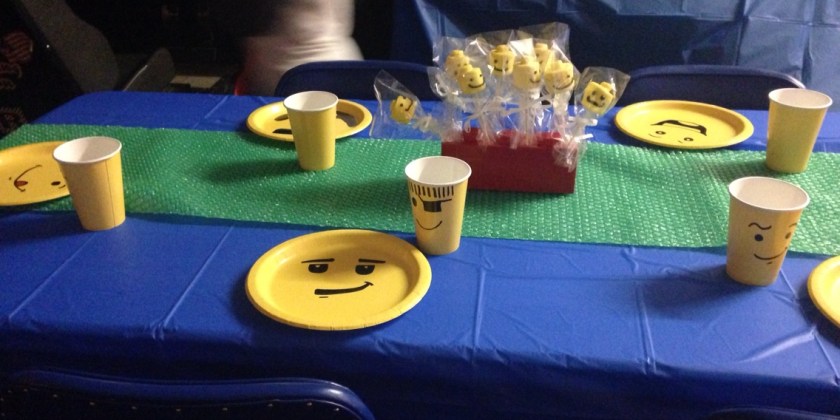
Marshmallow Lego Heads

One of my best friends actually made these for his party using a recipe from brendid.com.  She used a styrofoam brick painted red and stuck in each of the Lego heads.  It was a great centerpiece for the table.  She also put some in a mason jar full of Skittles.  

 
I won’t lie, everything took me quite awhile to put all of this together, but it was a fun and a labor of love.  My son and his friends loved the results.  If you use any of these ideas, add a comment below. I would love to hear how your party turned out.     

Posted in Daisy/Brownie Crafts, Girl Scout Crafts

Daisy/Brownie Reindeer Ornaments

A couple of weeks ago, my co-leaders and I were looking for some fun, easy ornaments for our Daisy and Brownie Girl Scouts to complete.  Our girls had 2 ½ hours to go to 10 different stations making crafts to take home – this was called a Make and Take Workshop.  

 While researching, we came across this great site called littlebitfunky.com in which she had made these adorable reindeer ornaments.  (check her out for her version and a few different variations) We decided to try them out with a few modifications.  The result: an easy, cheap, awesome craft that our girls and parents loved.

A few of the finished products…

IMG_5556

The only things we needed were some brown paint, a black Sharpie, red sticker gems (original was done with red paint) and an ornament for each girl.  Sharpies we had, brown paint was $.50 at Walmart, red gem stickers were $1.99 and the ornaments were only $3.00 for 12.  So far, so good!

How to make it

  1. The girls wrote their names and the year at the bottom of the ornament.  (Great keepsake for parents or grandparents)
  2. Next, they put their thumb in the brown paint and added their print to the ornament.  I had them do it thick since we were only adding 1 print.
  3. Their ornaments were allowed to dry for about 10-15 min.  Once dry, they added the antlers, and a red gem to stand for Rudolph’s nose.

They looked super cute and the girls couldn’t wait to put them on their tree.  


Special thanks to littlebitfunky.com for the original idea.

Posted in Scout Recipes

Caramel Apple Dump Cake

Looking for an easy dessert to make while camping?  Look no further because this recipe is one of our scouts’ favorite and very easy for them to prep. It’s a twist on the old favorite Apple Dump Cake.

Caramel Cobbler

Before we get started, remember to follow all safety rules and outdoor training guidelines.  For Girl Scouts, only certain ages are allowed to handle the fire and the charcoal part but all levels can complete the prep.  I usually have the girls prep in groups of 4.

To get started: you will need a few ingredients and some equipment.   

 Food Items Needed

  • 2 cans of Caramel Apples
  • 1 – 2 boxes of yellow cake mix (depending on preference)
  • 1 stick of butter

 Equipment Needed

  • 1 Dutch Oven     
  • Charcoal Chimney
  • Aluminum Foil  
  • Knife/Cutting Board
  • Charcoal     
  • Rubber Spatula
  • Can Opener

   Time to Cook!

  1.  Start heating up the Charcoal briquettes in the chimney.  We usually use 24 briquettes for a 12 qt oven.
  1. Line the Dutch Oven with Aluminum Foil and Spray (When our Daisy girl scouts complete this step, I always look over it making sure there are no holes in the foil.  The foil helps to make it a super easy clean up.)
  1. Pour both cans of apple filling into the Dutch oven- layer it evenly usually the spatula
  1. Pour the cake mix over top of the apples – Spread evenly (Depending on your scouts, mine like to use two boxes of cake mix.  It makes it a little taller and thicker but I think the taste is really the same as one)
  1.  Slice the butter and checkerboard the butter over the top ( Two of the girls usually slice the butter while the other two lay it out in a checkerboard pattern over the top)  Put the lid on the dutch oven.  
  1. Carry the Dutch oven to the fire ring and apply your piping hot briquettes with 10 on the bottom and 14 on the top.  That works great for our 12 qt but feel free to adjust your numbers depending on the size of your oven.  Each briquette is about 40 degrees. Dog food tin plates work great as a place near the fire to set the Dutch oven.    

7. Cook for about 40-45 minutes for 1 box of cake mix.  For 2 boxes, it usually takes about an hour.

Once removed, allow it to cool.  You can serve it warm or even have the girls make ice cream in a bag to go with the cobbler.   Enjoy!


(If you have some great variations of this recipe, let me know.  We always have a great time trying out new, easy recipes at camp.)

Posted in Lego Birthday

Lego Birthday Table

Lego TableNeed a great looking birthday table for a Lego party?  Here are a few instructions to create one in just minutes.  

  • First- buy a roll of green Bubble Wrap like the one made by Duck.  You can buy small or large rolls depending on how many tables you would like to cover.  The bubble wrap is used for the land area of your table.
  • Next, buy some dark blue table cloths.  This will serve as the water.  I bought mine at Walmart for a dollar each.   
  • Finally put the blue table cloth down and use the bubble wrap as a runner.  

We did that on every table, including the present table.  You can choose to leave it or if you want to put out yellow cups and plates to add to the theme, you can.  I bought our yellow plates and cups for a dollar a set at Walmart.

Now if you have time and would like to add another cool touch, you will need to be armed with a computer and a black Sharpie.

  • One of my best friends actually did this for me.  She used a black Sharpie to draw faces on each of the yellow cups and plates.  
  • She searched Lego faces on Google Images and then free drew each face.  She then added some sunglasses, chops, eyepatches and other features to make them a little more creative. For some of the girls, the faces even had lipstick on.  

The final product is pictured above.  The kids at my son’s party loved the table and had a lot of fun showing off their plates and cups to their parents.

Posted in Introduction

Super Moms

Super Moms:  Moms who live their life raising a family, being a taxi cab driver, doctor, counselor, tutor, scout leader, maid, actress, accountant, chef, etc to their children. They sometimes may even choose to maintain a career or job outside the home.  

Sounds easy right??

Thank goodness, there is help available and awesome websites loaded with ideas that help us create the ultimate birthday party or crafty idea for the house when we barely have time to think for ourselves.

As a Girl Scout leader, middle school teacher, wife and a mom, the time for myself usually gets crunched. If I’m not grading papers, creating lesson plans or being a mom, I’m usually pouring through Pinterest or other websites in the middle of the night trying to find something to add to the Christmas decorations or a new miracle anchor chart that will help my students understand fractions.  These ideas, that people have posted, have helped me tremendously by freeing up some of my limited time to actually be a mom and do things with my kids.  

The purpose of this blog is to provide some helpful hints to moms and dads, who like me, want to do terrific stuff for our kids, but also have time to ENJOY that stuff with our kids.

By sharing my thoughts, projects, and ventures, I am hoping to join the community of people who have helped me over the years with advice or shared their projects with me. They gave me ideas in which I could build upon and create new ones. This is my way of giving back to that community in hopes that by adding my ideas to the mix, I might be the one to save someone else time and energy. Which then of course can be spent on their kids or on themselves by taking a long, relaxing bubble bath!  

I hope you find some things on this blog useful!   I look forward to writing and sharing this journey with you.