Posted in classroom, Perler Bead Patterns

Harry Potter Mini Bead Fun- Sorting Hat Quote

Sorting Hat Quote- Framed Vinyl with the Houses made from Mini Beads

This is a super fun project that my daughter and I made together. This is one of my all time Harry Potter quotes from the sorting hat.

It is OUR CHOICES that show us what we truly are, far more than our ABILITIES.

We used some sparkling paper that we found at Joann’s (Amazon has similar here but not exactly the same kind that we used) and used our Cricut machine to cut the vinyl (black and holographic sparkle blue for a few important words). We used mini Perler and mini Artkal beads to make the houses and added a glass frame. The finished product is above. We feel that it turned out pretty well. (Side note- if you haven’t discovered Artkal beads, they are amazing. They melt great with Perler and they have so many more colors (See Gryffindor house above. I have linked their site also. I was skeptical at first, but now I love them! I have only used the mini beads but I’m sure the regular size would work as well.)

We made several of these and I have hung one of them in my husband’s classroom and another in my classroom in my reading area. They should be some great conversation starters with some of my students in the fall. Feel free to use our pattern above to make one for yourself or you can click here to go to my Etsy store to purchase to purchase one already made and will arrive to you through priority mail in just a few days. They are perfect to add to a classroom, library, living room, den, family room, kids room or practically anywhere.

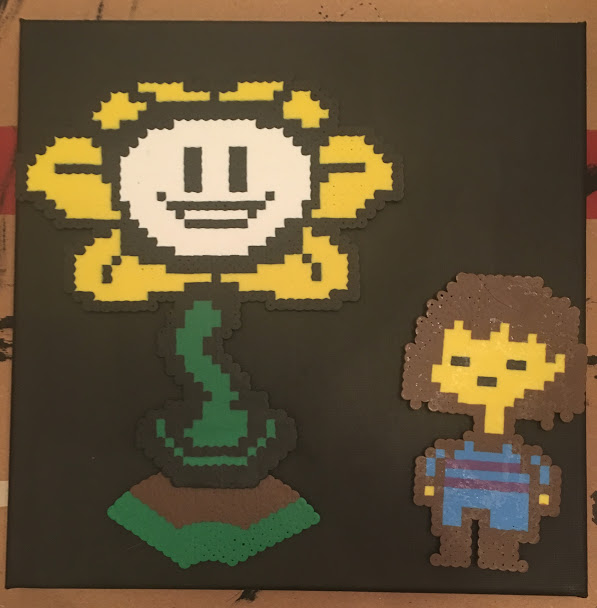
Please check out some of my other Perler projects….

If you would like to check out additional Perler Bead Patterns, click on the Menu at the top of the page or click some of the links below.
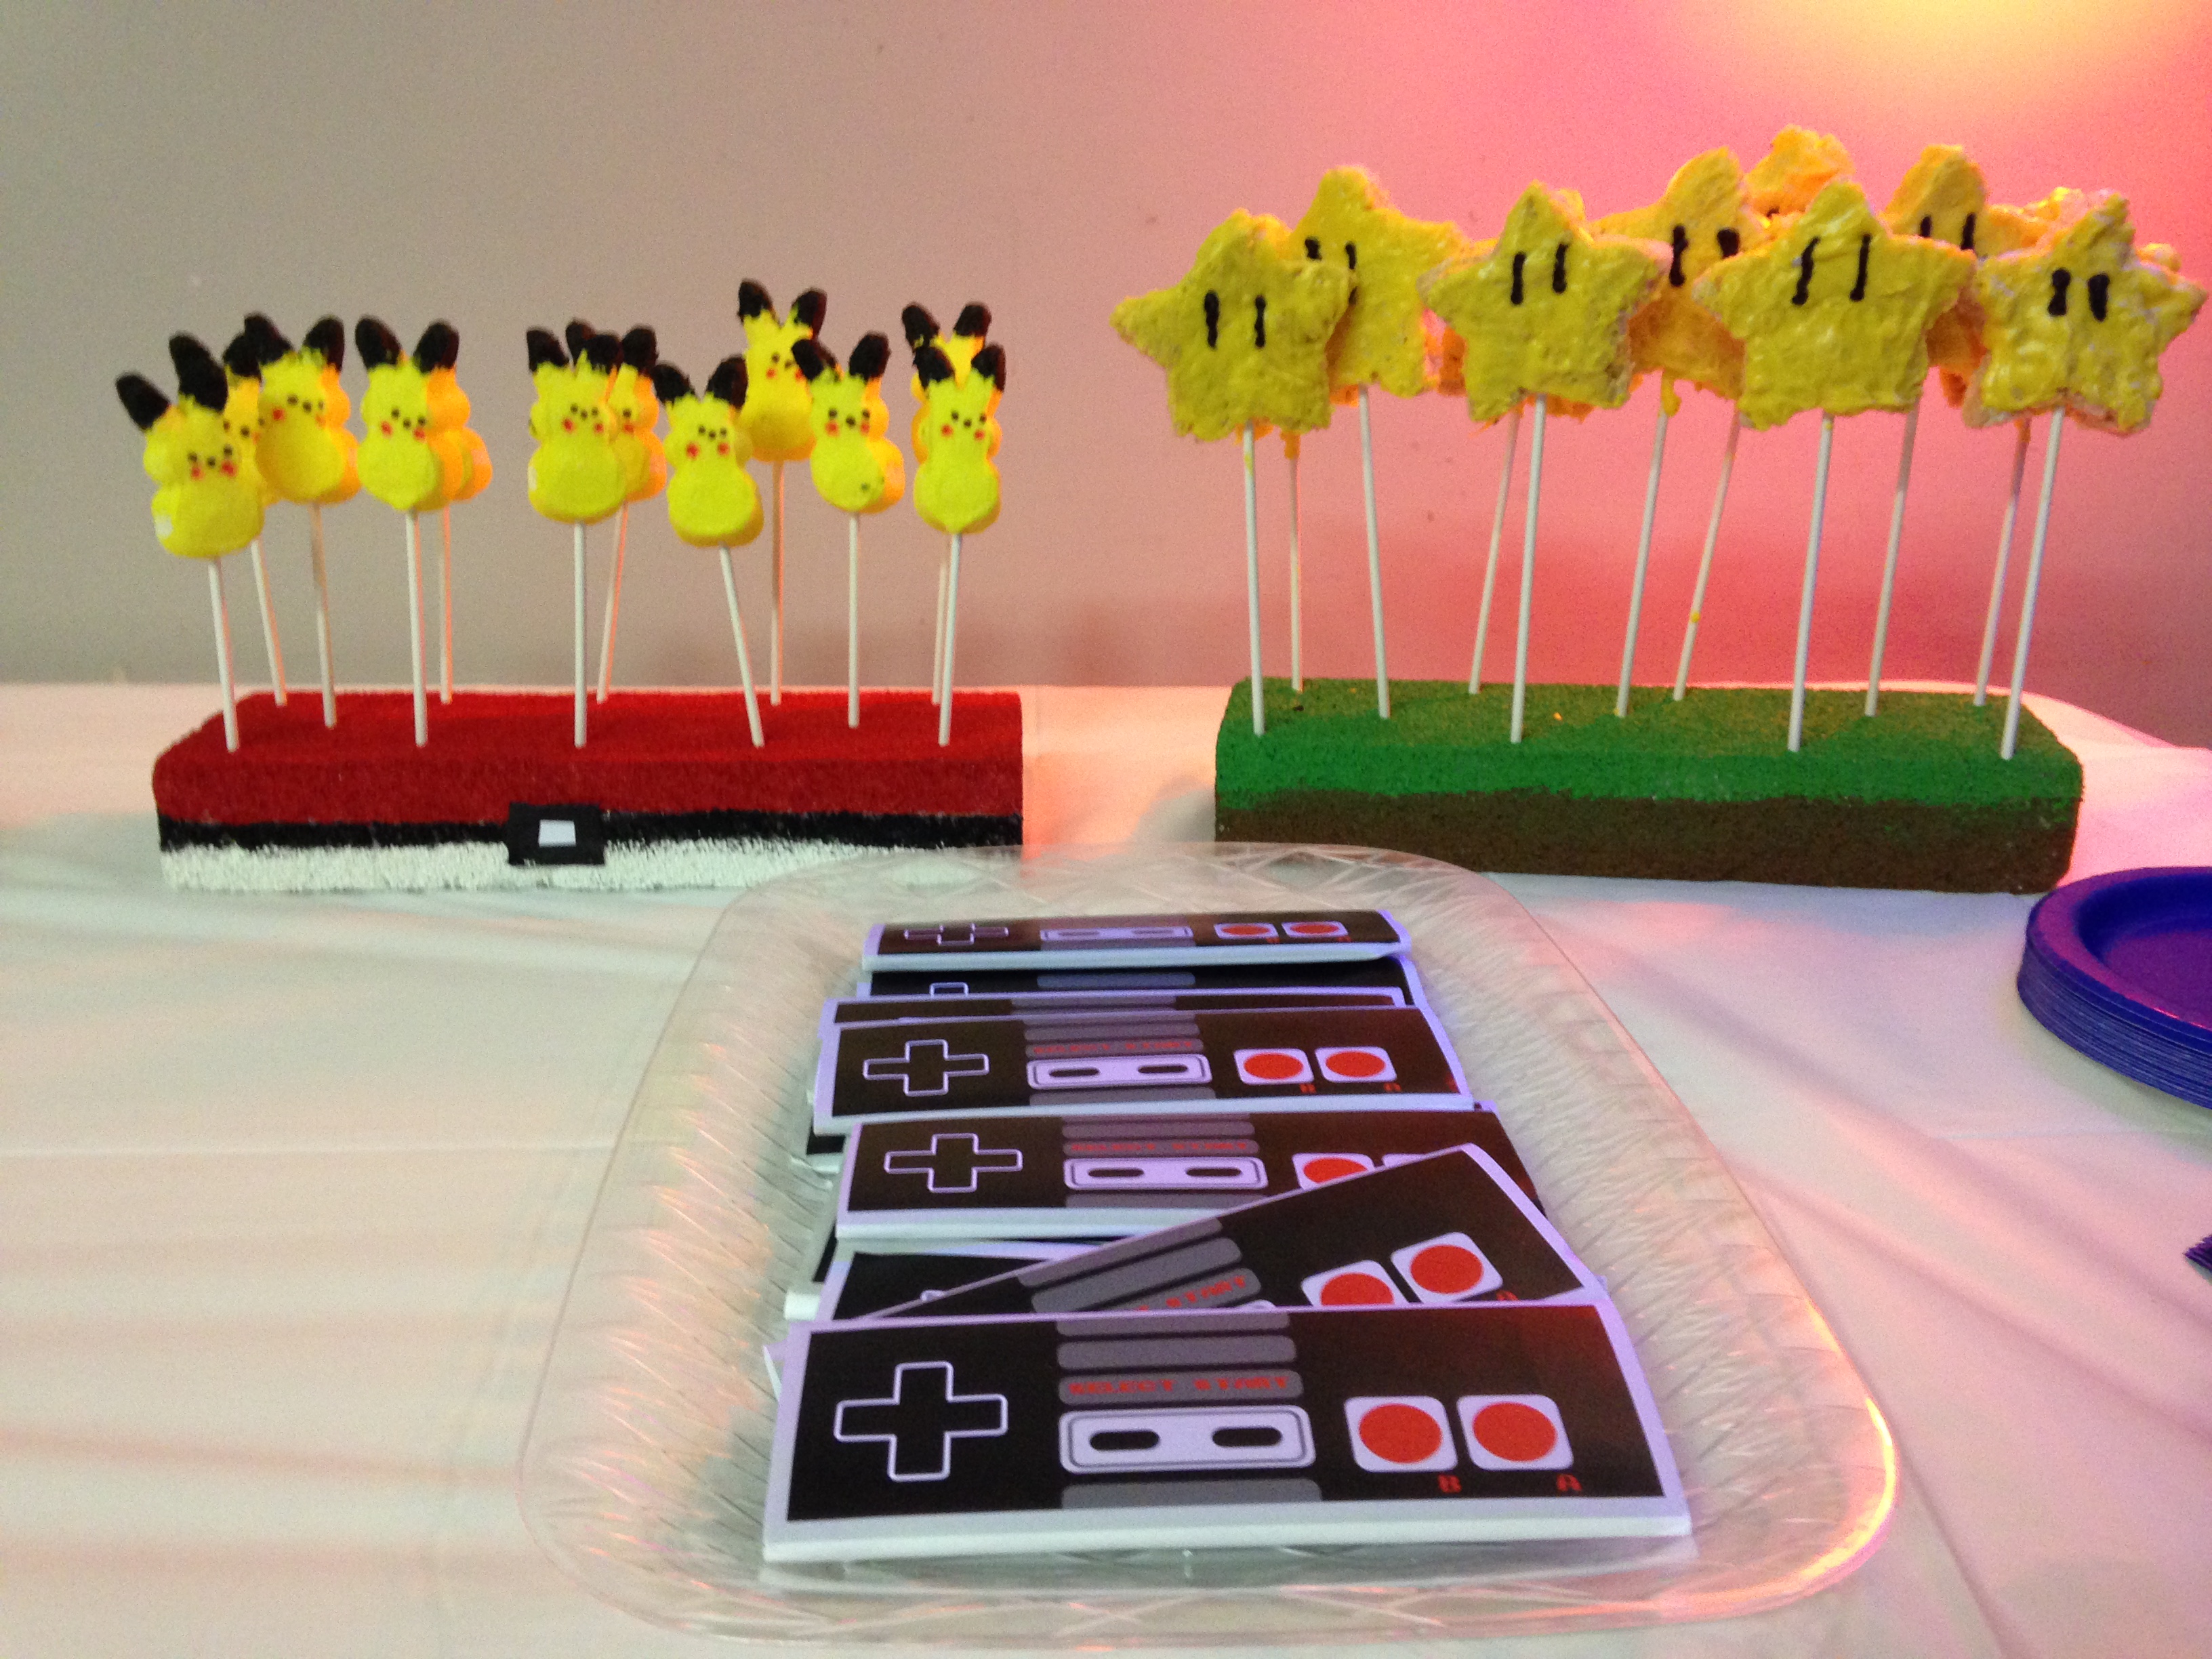
Also, Check our our Etsy Store -Galaxy of Pixels! Sign up for our shop newsletter to receive a 10% off coupon for your next order.

Or join our mailing list below to get updates and follow our blog.  Thank you for joining!

Processing…
Success! You're on the list.
Posted in Birthday Parties, Minecraft Party

Minecraft Birthday Party

For my son’s 9th birthday, he decided he wanted a Minecraft theme. This was a lot of fun to make and he was so excited!

For the cake, we used Rice Krispy Treats which the kids thought was super cool. Due to his food allergies, we made ours from scratch but you could also buy a Rice Krispy Sheet or tray that is already made for easier prep. The best thing about making them from scratch or using a tray is that you can cut the squares any size that you would like. We used a 9 x 13 in pan, blue jello for the water, plain Rice Krispy treats for the sand, and Cocoa Rice Krispy treats with green icing for the dirt and grass. Add a few Minecraft Mini Figures like Steve and some Cows or Zombies and done!

My friend actually made this giant wall decoration made from light green, green and black square party plates. We used left over plates for the kids to gather their supplies (aka food).

She used hot glue to glue all of the plates to foam board which she also glued together. The result is in the picture. It was a great addition to the party.

Now for the awesome food!

minecraft party 4.jpg

I wish I could tell you how my friend made the super cute signs, but I’m not totally sure. I believe she used Google Images to cut and paste them together. However, I can tell you how I made the food.

We used..

  • Carrots – baby carrots
  • Sticks – pretzel sticks
  • Cookies – small chocolate chip cookies
  • Trap Doors- Window Pretzels
  • Diamonds – Blue hard candy (we bought ours at Party City, but attaching the Amazon link here in case you need a lot of them)
  • Emeralds – same as Diamonds, except in green
  • Iron – Hershey Nuggets
  • Gold- Hershey Nuggets
  • Mushrooms – these were fun, white jumbo puffy marshmallows topped with red icing and white chocolate chips.
  • Watermelon – watermelon taffy

Add Sprite bottles with labels peeled and turned into Creepers with a sharpie, and green party cups and a party was made!

If you would like to see some other themed birthday parties, click menu and birthday parties or click any of the links below.

Posted in Perler Bead Patterns, Undertale Patterns

Undertale Party Decorations – Flowey, Fisk and Napstablook -Perler Beads

Flowey and Fisk Undertale Party Decoration Canvas

Undertale Party Decorations- Flowey Fisk Canvas

This canvas is going in our Undertale Party decoration box and will be hung on the wall in our next Undertale party!  We used Perler beads (aka Hama or Melty beads) to design the mound, Flowey and Fisk.  Next we painted a 12 x 12 canvas black and hot glued the designs onto the canvas.  The result is above!  To make the decorations,  our patterns are below.

Flowey

Original pixel art- Kandi Patterns.  Made with green, black, white and yellow Perler beads.  You can also use Hama Beads or Melty Beads.  It took 6 grids to make.

Fisk

Original pixel art by Kandi Patterns.  Used dark brown, blue, black, peach, and purple Perler beads.

Napstablook

This little guy will be placed on the food table.  Going to tape a couple of bamboo skewers onto his back and place in a painted foam block.  This will make a cute decoration!

For more Undertale Party ideas, please click on menu at the top, birthday parties, Undertale.  Or Just click below…

If you would like to check out more Perler Bead Patterns, click on the Menu at the top of the page or click some of the links below.


Posted in Math is Awesome!

Classroom Decorations in Math

This year, I decided, was going to be the year that I add some more color to my classroom.  Being in a middle school math classroom, I was afraid this wouldn’t be very easy, not like in those cute elementary school classrooms anyway.

Luckily I found these two super cute decorations at Hobby Lobby.  For the Welcome to Math Class Sign, I used Command Hooks  and some cute sticker letters to write Math on the chalkboard middle and hung it outside my door.  The other one I put on the inside above the pencil sharpener so the kids could see it.  I loved the extra color, the cute designs and… the 40% off coupons from Hobby Lobby!

Classroom Decoration

Classroom Decoration Math

While looking through Pinterest and other sites, I came across this math blog by Sarah Hagan, a high school math teacher, Math = Love and she had some amazing ideas.   On her site, I found this little gem which she had already typed using the super cute font and had it ready to download.  All I had to do was print, cut, glue and laminate.  If you would like a copy of this, you can access her site from here.   This went up outside my classroom door above My Welcome to Math Class Sign.

Classroom Decorations Mathematicians

Like me, Sarah Hagan had read a great book called Mindset, The New Psychology of Success.  Over the last couple of years, I had begun teaching the difference between a fixed mindset and a growth mindset.  This I believe  is especially important in math as I have heard from numerous students and parents, “I’m not good at math”  and “I can’t do math.”  I’m thinking she may have heard things like that also as she had a neat board called “Change your Mindset, Change your Words.” On this board, she had several sayings both in a fixed mindset and growth mindset.  What’s even better, is that she had these ready to download free of charge.  You can access her site here.   Using her site, I was able to download the posters and create a board of my own called “Help!!”  In my classroom (and others around the building,) my students aren’t allowed to say “I don’t get it” without saying the word “yet”.  Also sayings like “This is too hard” and “I give up” or “I quit” aren’t allowed.  If this is heard, my other students usually quickly jump in to correct them and help is given but they must keep trying.

Growth Mindset vs Fixed Mindset Bulletin Board classroom decoration

Using the growth mindset has really changed the way the students learn.  They are looking at something challenging in a more positive way without giving up.  As the year progresses, I’m looking forward to adding more great anchor charts, more additions to the growth vs fixed mindset theme,  and additional math decorations to the walls throughout the new school year.

Posted in 3rd Grade

3rd Grade- Open House Picture Frame for Parents and Students

3rd Grade Back to School Parent student Frame!

This is a neat idea my husband came up with for open house. Parents/caregivers and students can get their picture taken during open house as an introduction to 3rd grade. However, this can be used for any grade.

Frame was bought at Hobby Lobby (clearance aisle, yay!!) for about $4.00 and we used a glue gun and ruler to glue each crayon in a pattern around the frame.  We used 9 boxes of crayons!

He used apple clip art to create the apples which he colored and glued on yellow card stock.

The top of the frame was made with items from the Dollar Tree.  The cutout designs came in a package and we just added the poster board letters.  To hold the signs on, he colored 3 clothes pins with sharpies and glued the pins to the frame.  This way he can use it for different events and years just by simply changing the signs.

Overall it turned out really great!  Can’t wait to use it for open house!

Posted in Gaming, Gaming Party

Gaming Party -Part 2 – Drinks, Cake, Decorations and More

Zelda was another major game in my son’s life.  We have played all of them and have spent many hours and days enjoying this game.  Of course, we had to throw some Zelda decorations in!

My friend is quite talented and pulled the picture of the “Will Cut Grass for Rupees” sign from another birthday party.  I believe she may have gotten the idea from here. (Zelda Birthday Party)  She used poster board and markers to make the sign below.  I made the green, red and blue jello cups to represent the Chu Jellies and my husband made the cool label below.

Since we were in an arcade and it was a gaming theme, the small cups on the side held chocolate quarters which represented the tokens for the games.  Each kid got a chocolate token cup to eat or take home.

Zelda, Birthday Party, Gaming, Chu Jelly

Zelda Themed Chu Jellies


We served Hawaiian Punch for drinks.  To add some Zelda to it, my husband made these labels to represent the Health & Mana.  The canister set was bought at Wal-Mart (Pioneer Woman – but any will do)

Health & Mana Juice, gaming birthday

Health & Mana Juice made from Hawaiian Punch in a Pioneer Woman Canister Set!


Special thanks to this amazing blog for giving me the following idea.  To make this banner, I googled images of 8-bit Zelda heart containers.  Using Microsoft Publisher, I made the heart large and sent the image to Office Depot.  They printed the image out on card stock so all I had to do was cut out the hearts, and glue some twine onto the back.   I used a wii remote to estimate how far between each heart.  The result is below.

Zelda banner, birthday
Zelda banner made on card stock and twine


With a Zelda throw in complete,  it was time for some Pac-Man decorations!  What gaming party would be complete without Pac-Man??  My son and I played this quite a bit when he was younger.  So our cake and table was set up using white cupcakes as the pellets, and yellow cupcakes as the power pellets.  We put a yellow cupcake on the corner of the tables.  The cake was set up as Pac-Man eating the pellets. We  even put 18 candles inside the 18 cupcakes so he had to blow them all out around the table!

To make the cake, I just baked a circle cake and cut a triangle out of it.  I used chocolate cake mix and frosted the outside yellow.  The result is below.


With some Nerdy Nummies Gameboy Ice Cream Sandwiches (I forgot to get a picture, they were gone so fast, however I am attaching her link here) and some Hershey wrapped Super Nintendo candy bars, the decorations and food were complete. (The Hershey bars were made with a Super Nintendo image printed out large and taped around a Hershey bar)

The kids loved seeing all of the games that they grew up with and my 18 year old son was super happy.

gaming birthday party
Putting it all together!

Please check out our pictures from this party Gaming Party -Part 1 or other themed birthday parties…

Posted in Gaming, Gaming Party

Gaming Party- Part 1

My oldest son decided on a gaming theme for his birthday this year.  Since he was turning 18, I decided to do a throwback to all the games he liked to play as a kid.  Pokemon was huge in his life and he still loves it. So it made sense to do a few party favors Pikachu style!

The following treats were made using yellow bunny Peeps, a red edible marker, and black icing for the ears.  Sucker sticks were inserted inside each Peep and then into a foam block.  I used red, white and black paint to paint the foam block to look like a Pokeball.  The middle “button” was made from a small piece of paper with black tape around it.

Pokemon, Pikachu, Peeps, Birthday, Gaming
Birthday Pikachu Peeps!


Mario is another huge game that he played while growing up.  So I began searching for  ideas to make something Mario themed.  Nerdy Nummies is one of our favorite channels to watch on YouTube.  My youngest son even bought me the cookbook for Mother’s Day.  The chef on that show is absolutely amazing!  I have nowhere near her talent but thought I would try and copy her recipe for Mario Rice Krispy Treat Stars.  Mine didn’t turn out as nearly as good as hers, but we did have fun attempting to make them and then painting the foam block to mimic dirt.  The boys loved them!

If you want to check out the original stars, I am adding the link below.

Nerdy Nummies Mario Stars

Rice Krispy Treats, Mario, Stars
Mario Star Rice Krispy Treats!

Please check out our pictures from this party Gaming Party -Part 2 or other birthday parties…

Posted in Thinking Day

Girl Scouts Ghana World Thinking Day Hut

Our Cadettes wanted to create a version of a mud hut to represent Ghana at our World Thinking Day.

Traveling Girl Scouts could walk into the back of the hut and get their picture made in the window.  There was a small ladder inside so smaller girls could look out the window.

There was room for about 3 girls inside.

Ghana, Thinking Day, Mud hut, paper mache
Our girls created their version of a mud hut – made out of paper mache, cardboard, expanding foam and mud.


We started this process with a large cardboard box.  To make it thicker and sturdier, the girls used paper mache and added two layers.

paper mache, Girl Scouts, Ghana, hut
Using paper mache to add two additional layers to the box.

While the paper mache was wet, we used lent and expanding foam to make it look like clumpy mud and give it texture.

paper mache, Girl Scouts, Thinking Day, Ghana
Adding the lent to the box

Once the layers began to dry, the paint came next.  We painted a coat of white primer to the outside and then added some brown and black mixed.  We used spray paint to cover parts of the expanding foam.

For the finishing touches, sticks were added to frame the window and the straw roof was made by cutting up a Hawaiian skirt.  Adding a drum that the girls made and used in their entertainment piece along with the flag completed the hut.  The girls loved it and were quite proud of how it turned out.

Currently the hut is in our garage, but we are thinking about reusing and making into a Gingerbread House for our Christmas parade float.

Please check out some of our other Ghana Thinking Day posts….

Posted in Lego Creations

DIY Lego Christmas Tree

  • My son and I were trying to come up with some Christmas decorations Lego style.  He decided that his Lego people needed a Christmas tree.  🙂  The result….

2015-12-23 17.39.02
DIY Lego Christmas Tree

  • We used brown bricks for the base of the tree and green bricks for the tree itself, making it move into a triangle shape.  At the end, we topped it off with a yellow brick for the star.  
  • To add a little more festive feel, we had some stickers from Hobby Lobby left over from Girl Scouts.  We added some red glitter stickers for garland, and some glitter dots for ornaments.

-No tree is complete without presents, so we added some.  To make the presents, we used 2×2 bricks and a small round piece for the bow.  The tall present was just made from a different type of brick.  You could make any type of present from any size Lego bricks.  

Have fun!   We would love to see some of your tree creations and present designs.

Posted in Lego Birthday

Lego Birthday Table

Lego Table
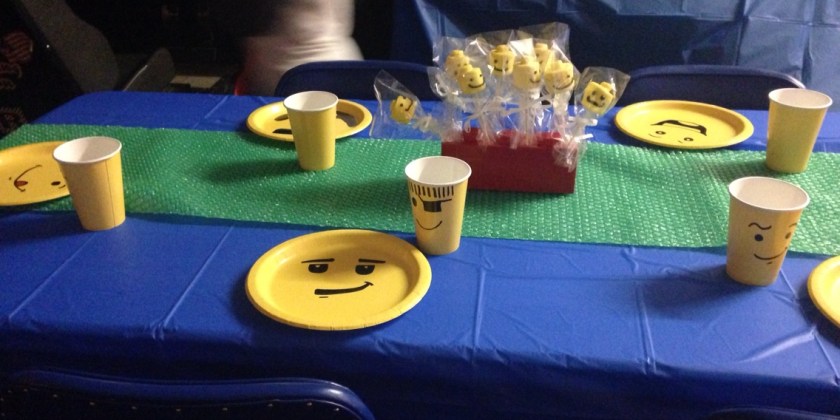
Need a great looking birthday table for a Lego party?  Here are a few instructions to create one in just minutes.  

  • First- buy a roll of green Bubble Wrap like the one made by Duck.  You can buy small or large rolls depending on how many tables you would like to cover.  The bubble wrap is used for the land area of your table.
  • Next, buy some dark blue table cloths.  This will serve as the water.  I bought mine at Walmart for a dollar each.   
  • Finally put the blue table cloth down and use the bubble wrap as a runner.  

We did that on every table, including the present table.  You can choose to leave it or if you want to put out yellow cups and plates to add to the theme, you can.  I bought our yellow plates and cups for a dollar a set at Walmart.

Now if you have time and would like to add another cool touch, you will need to be armed with a computer and a black Sharpie.

  • One of my best friends actually did this for me.  She used a black Sharpie to draw faces on each of the yellow cups and plates.  
  • She searched Lego faces on Google Images and then free drew each face.  She then added some sunglasses, chops, eyepatches and other features to make them a little more creative. For some of the girls, the faces even had lipstick on.  

The final product is pictured above.  The kids at my son’s party loved the table and had a lot of fun showing off their plates and cups to their parents.